
Jules joined cub scouts this year and as part of joining, he was given a cub-scout branded Estes rocket to build and launch at the Rocket Into Scouting event to jump start his membership.
While the rocket was branded for Cub Scouts, I recognized it as a variant of the Estes Mosquito my brother and I had both built as kids. They’re utterly simple. They take small A-sized rocket motors without an ejection charge because the rockets do not have a parachute mechanism. Weighing less than two ounces (without motor), they don’t weigh enough to crash or break up on impact. They simply go up and then come down.
The launch was the highlight of the event. Rather than just put Jules’ rocket on the shelf, I thought we could build a launch pad and launcher to do our own launches. I built one with my dad 25 years ago, so I thought I’d do the same with Jules.
Launch switch
Materials:
- Big Launch Button
- Master on/off switch
- Wire, quick connects, wire nuts
- Alligator clips
- Launch box
- Battery
- Sticky back velcro
- Packing tape
Tools:
- Wire stripper
- Wire crimper
- Drill & bits
- Hobby knife
- Soldering iron
I could have just bought an Estes launcher but that would not be nearly as fun or cool. Instead I went to Ax-Man Surplus, Minnesota’s above-ground landfill.
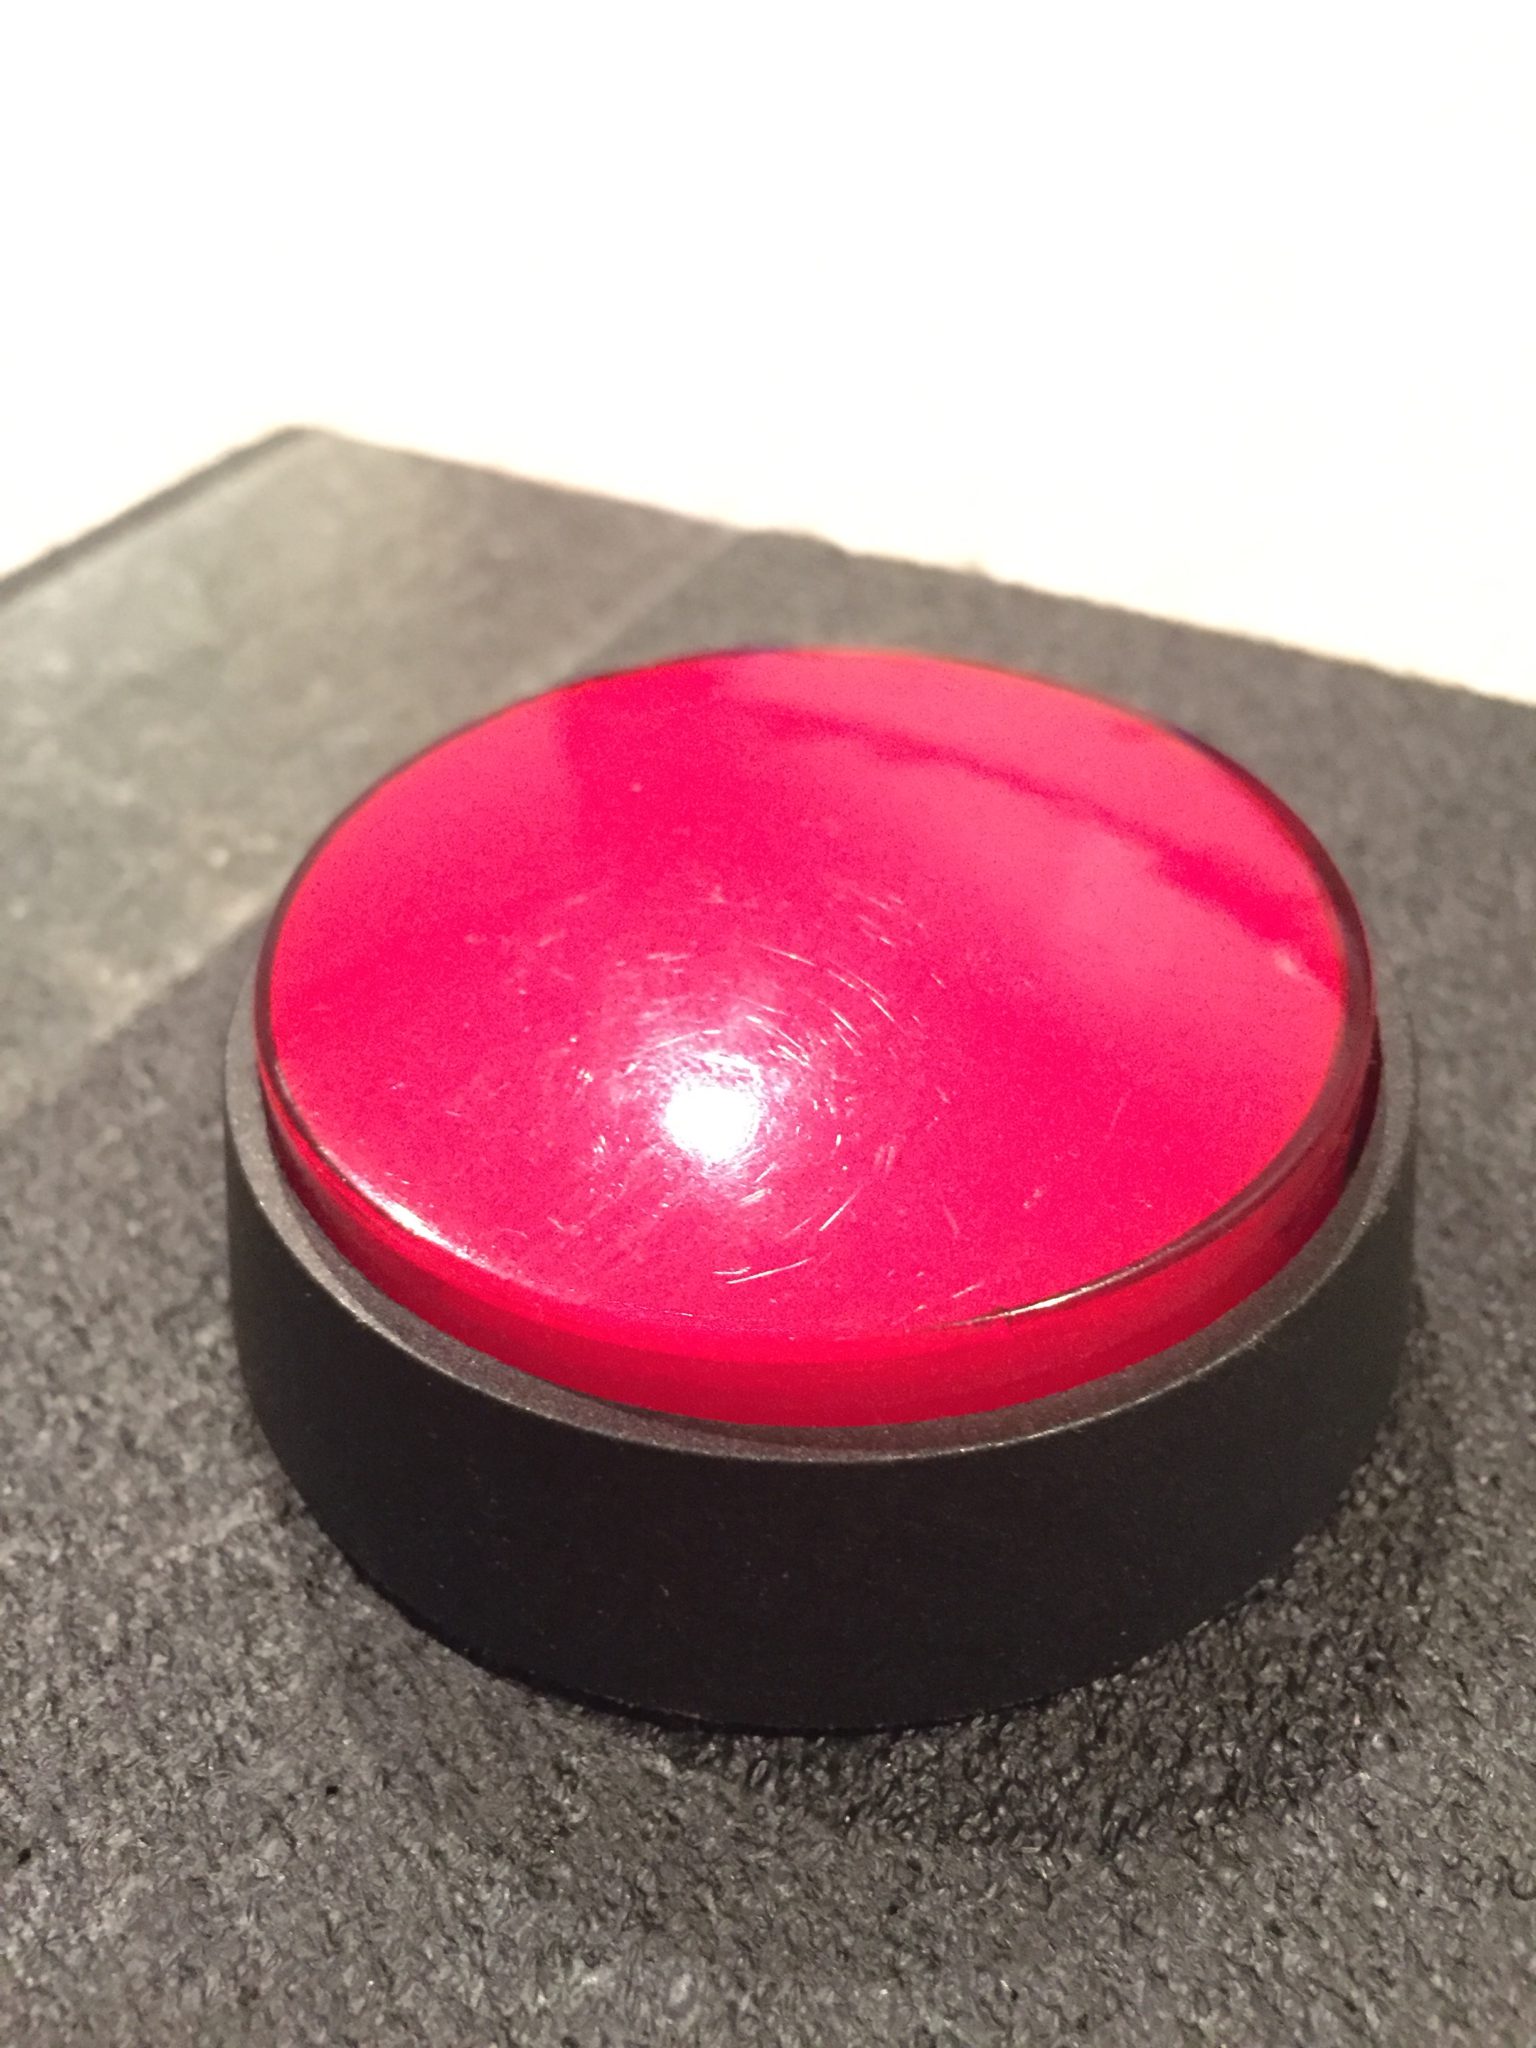
There I bought a giant red light-up launch button:
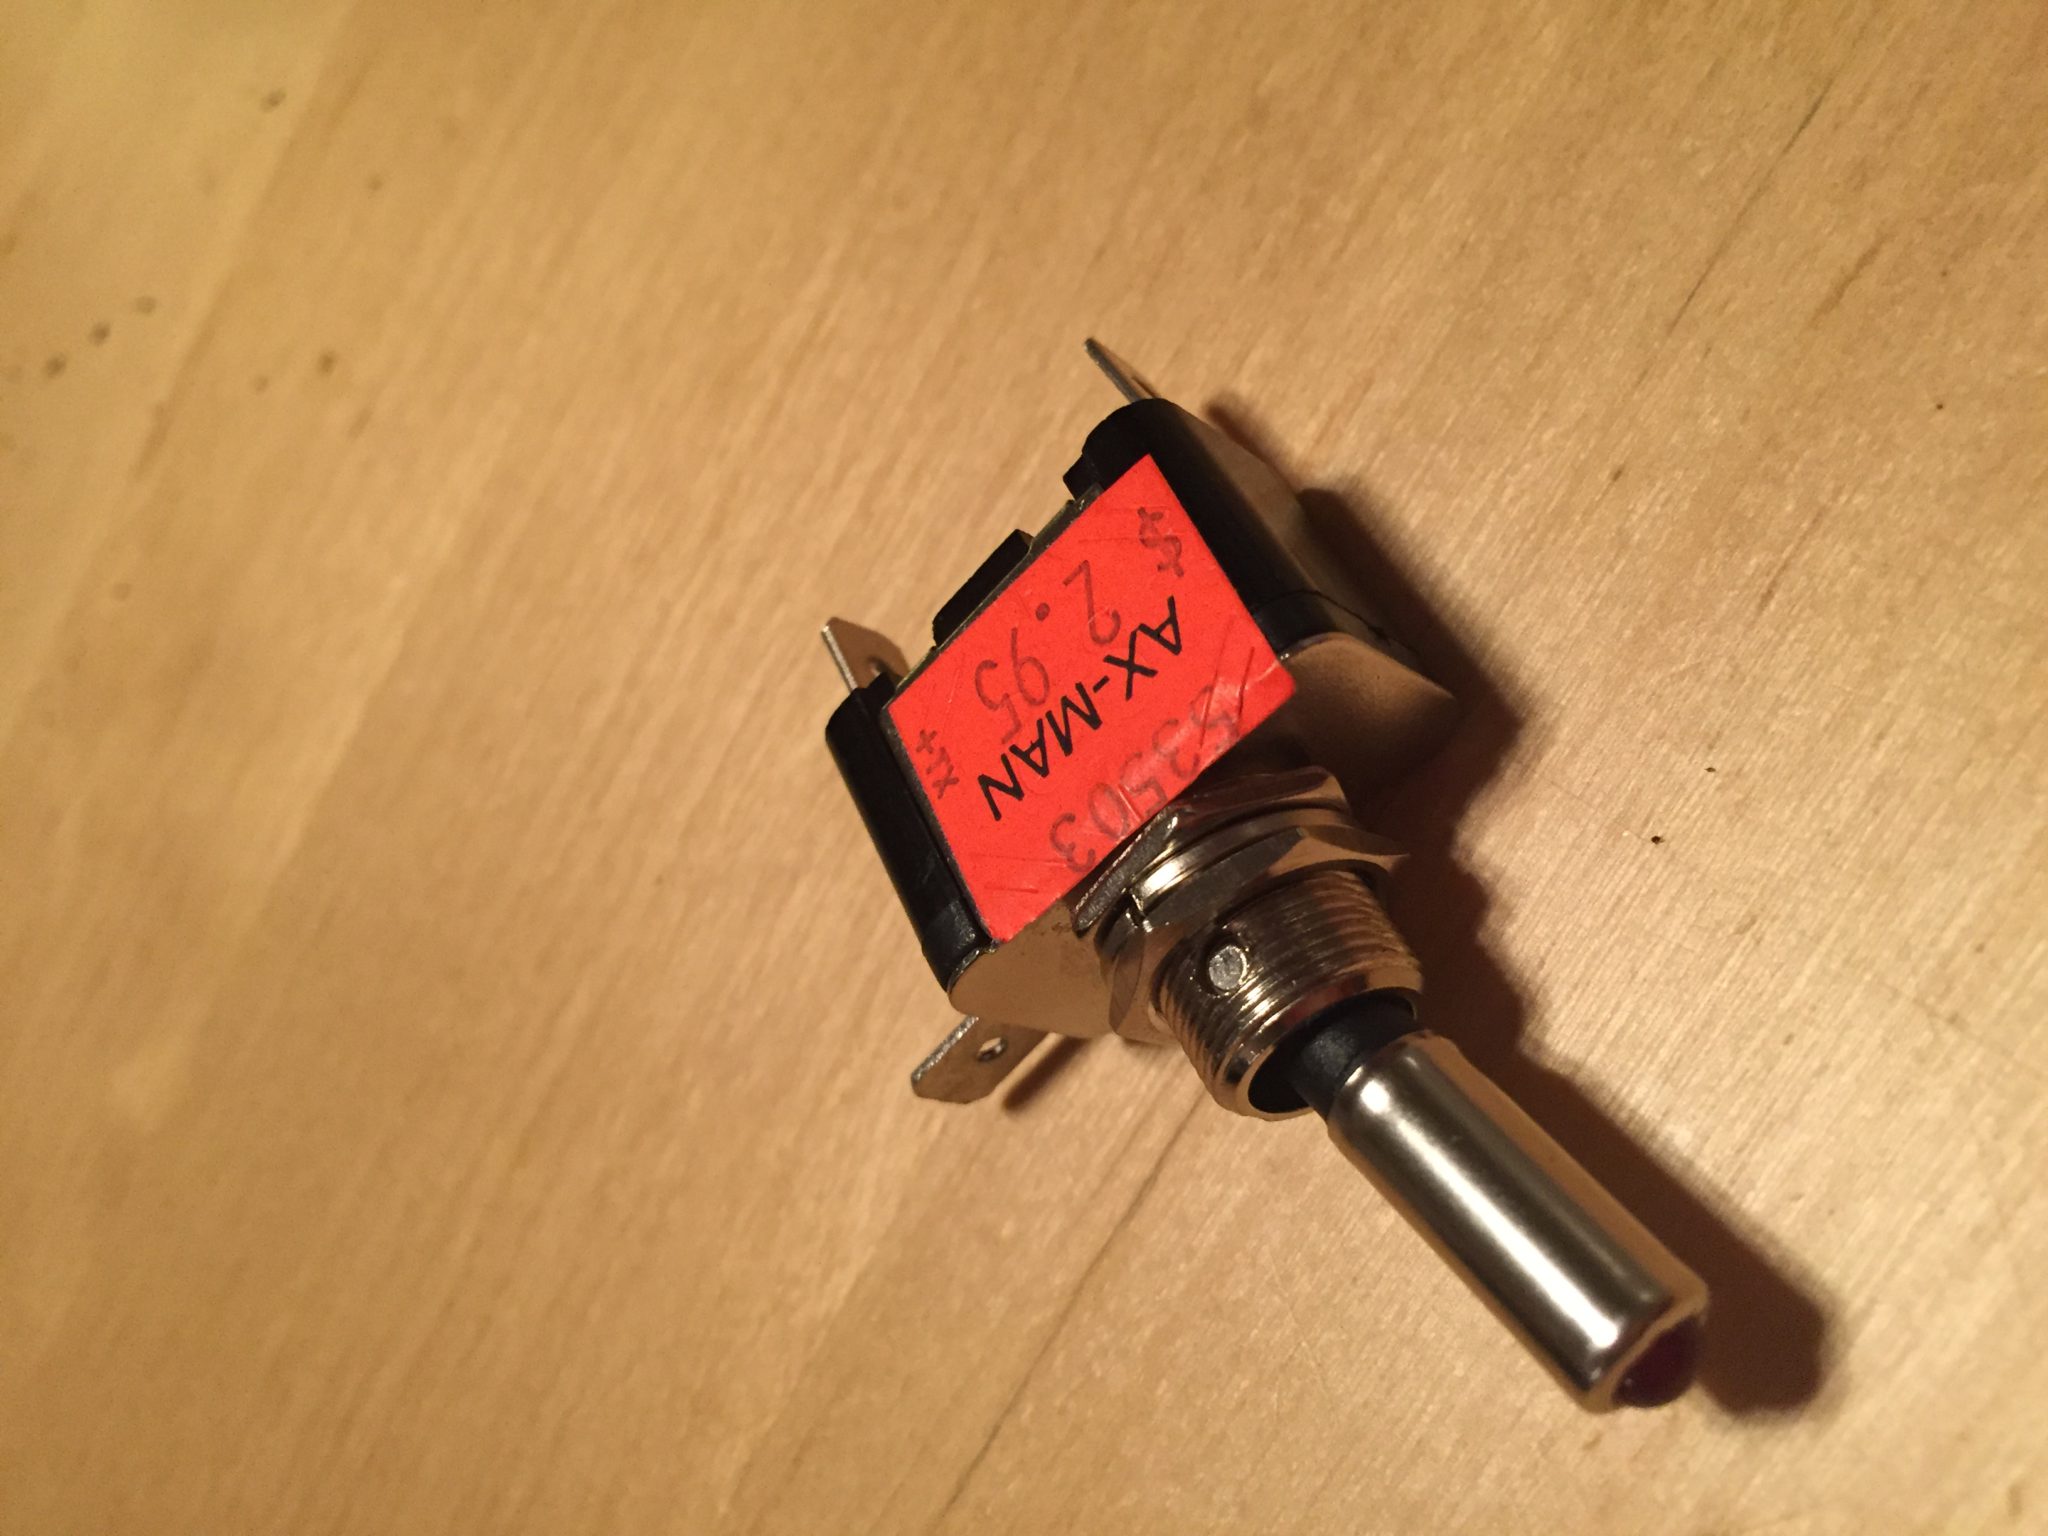
An LED indicated master switch:
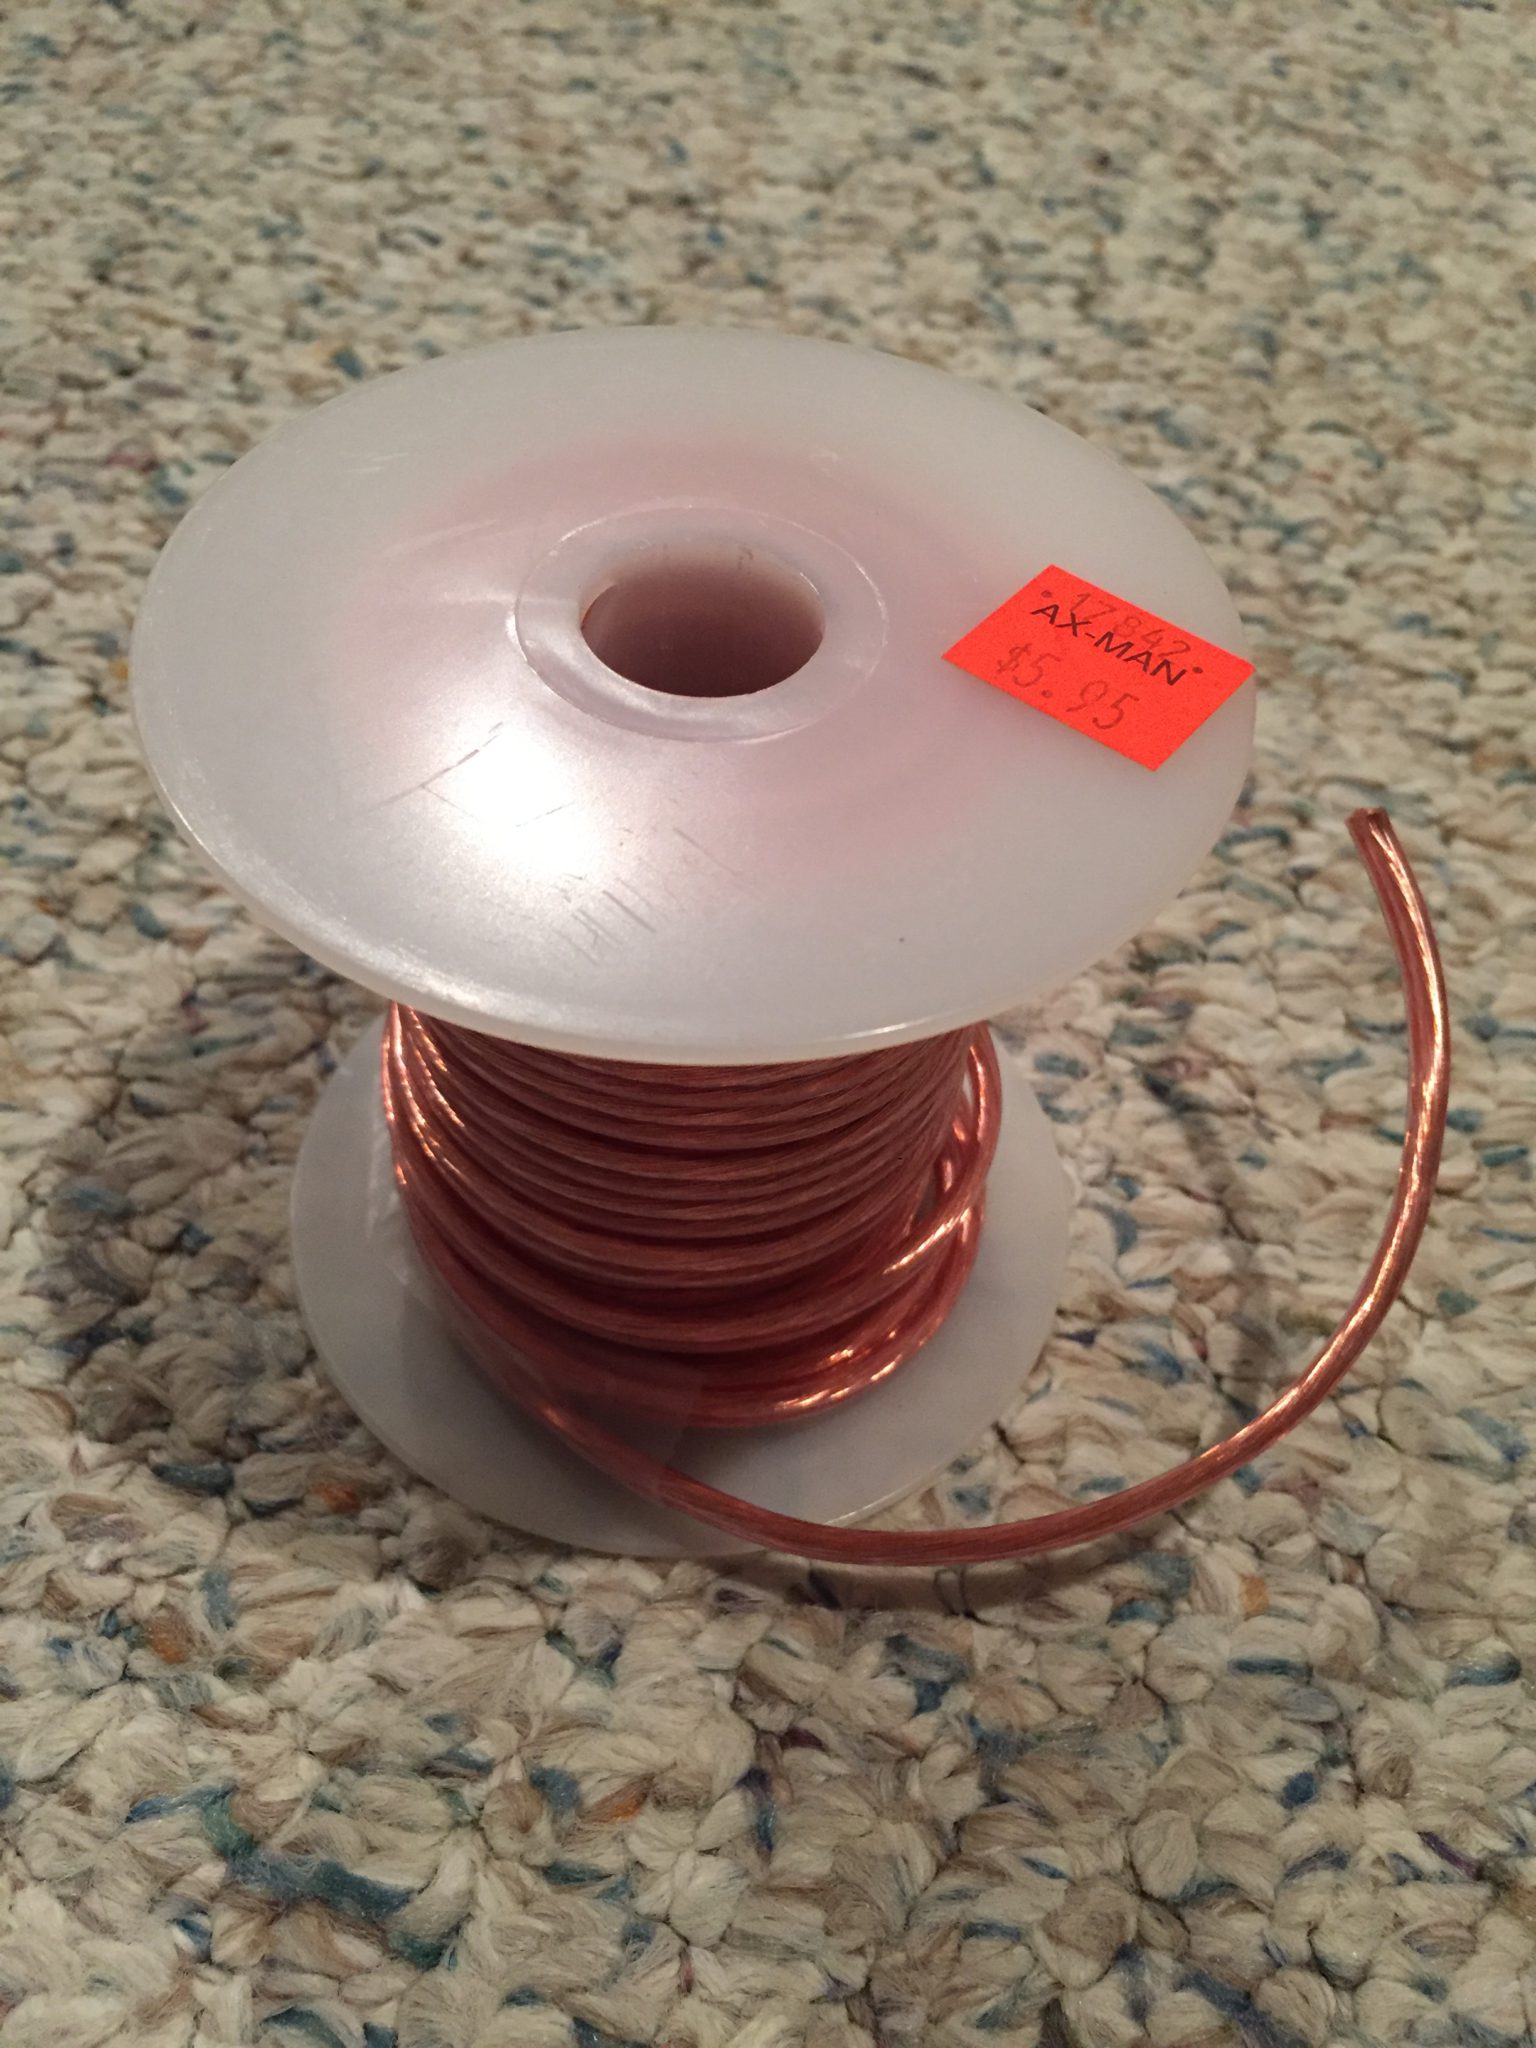
A spool of speaker wire:
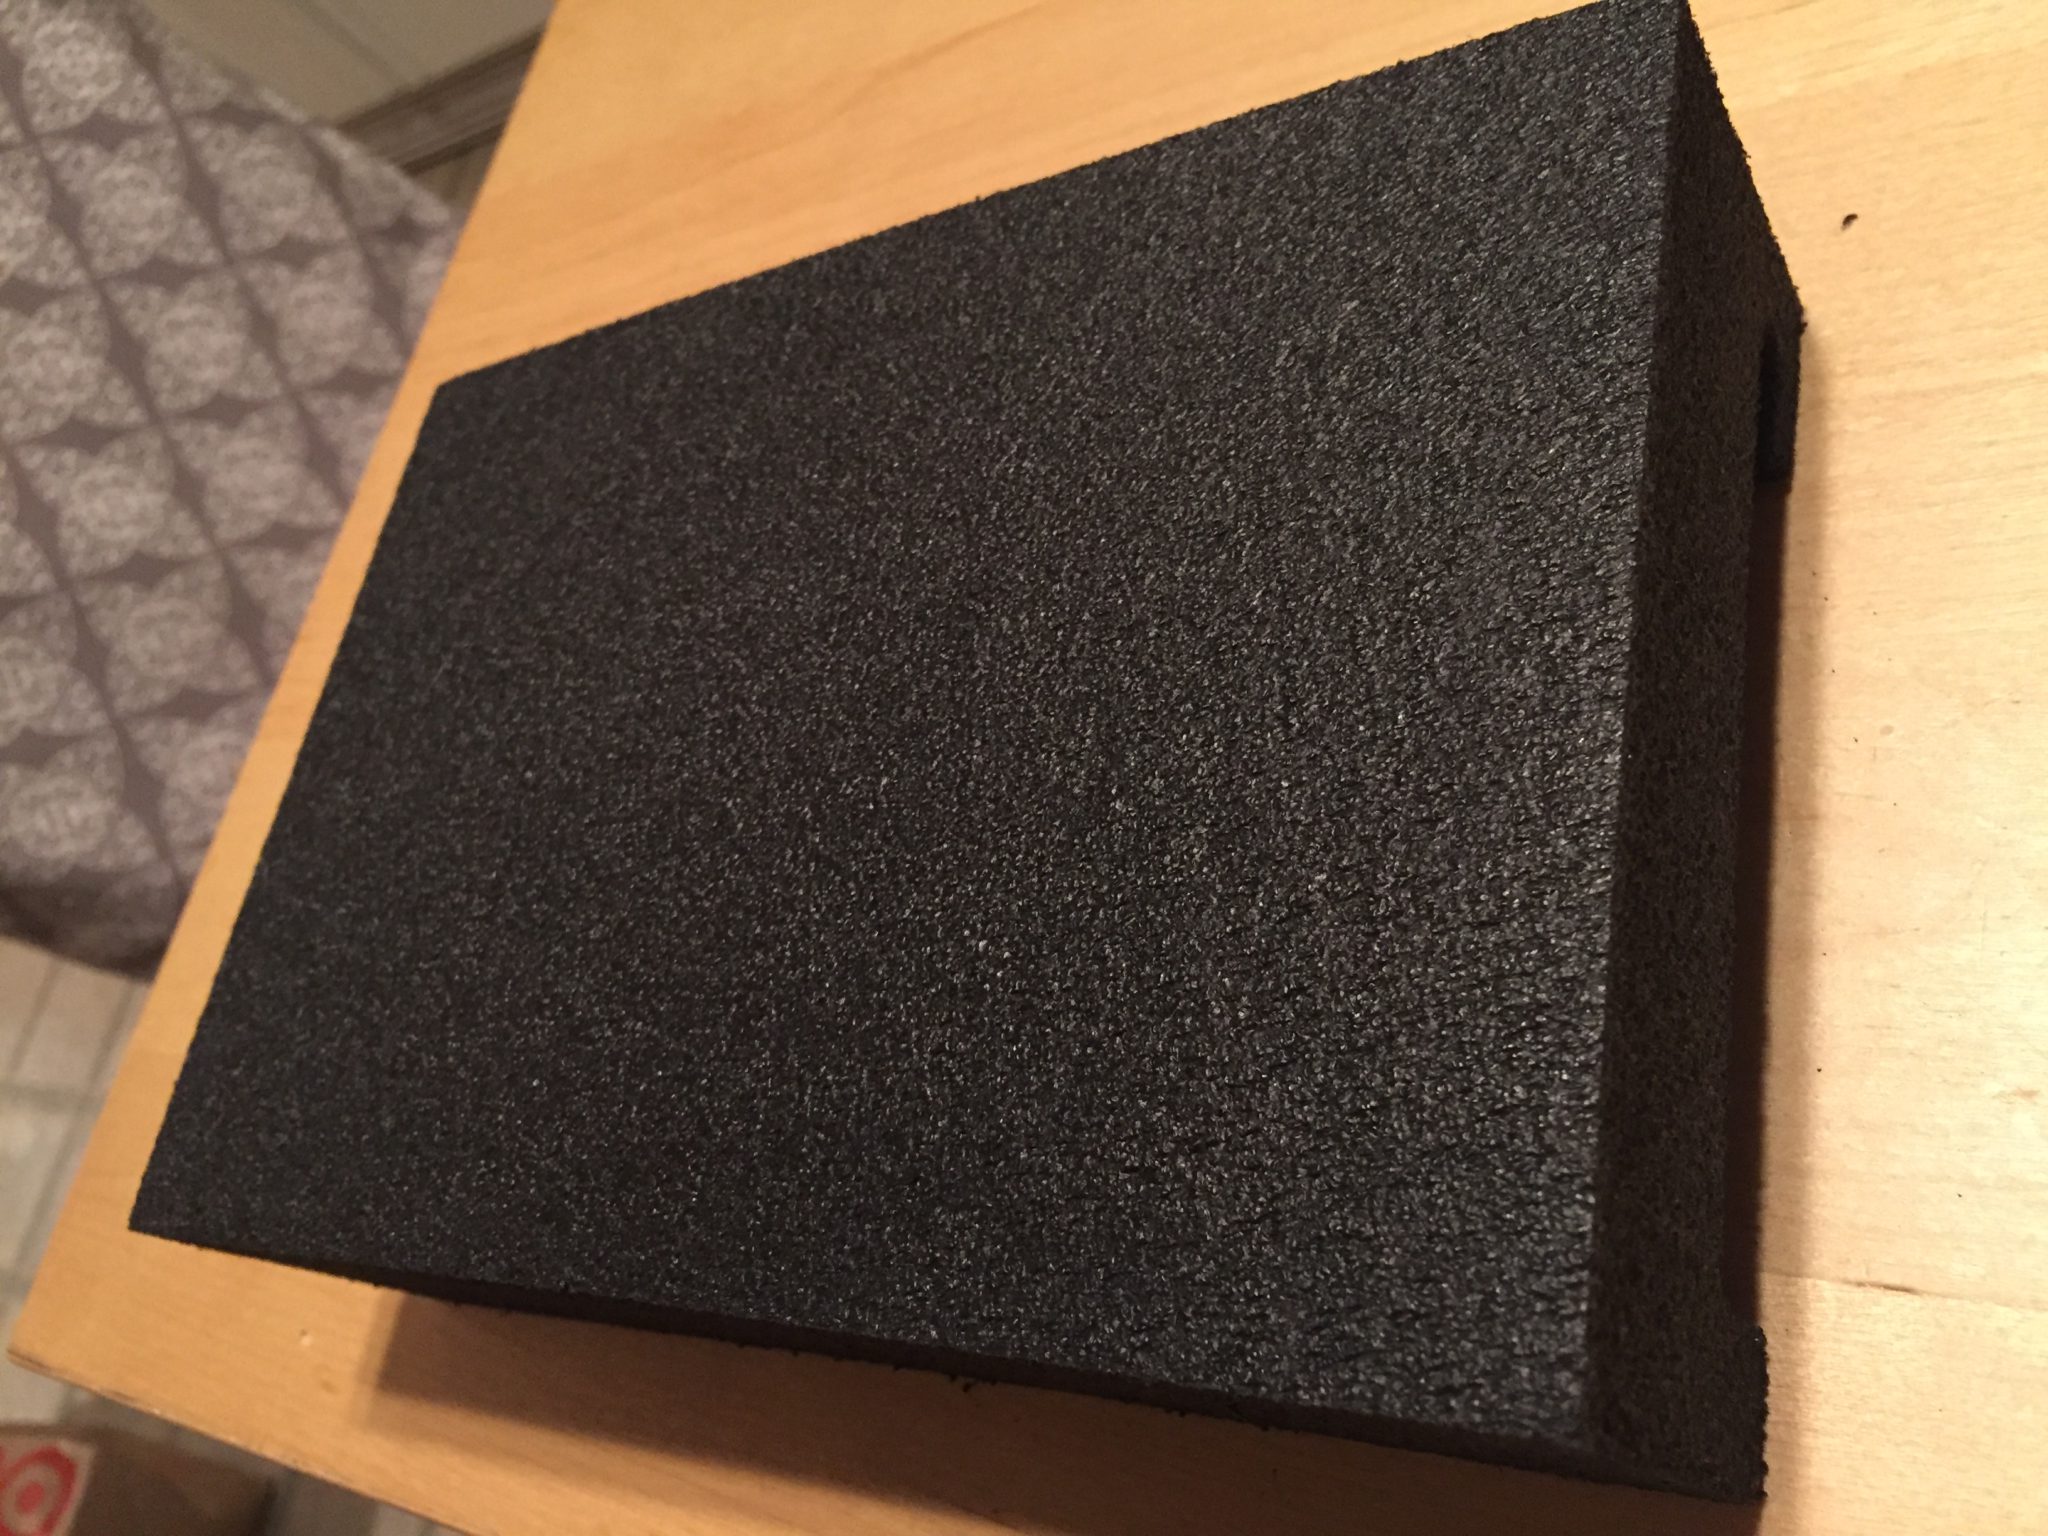
Foam blocks to build a box out of:
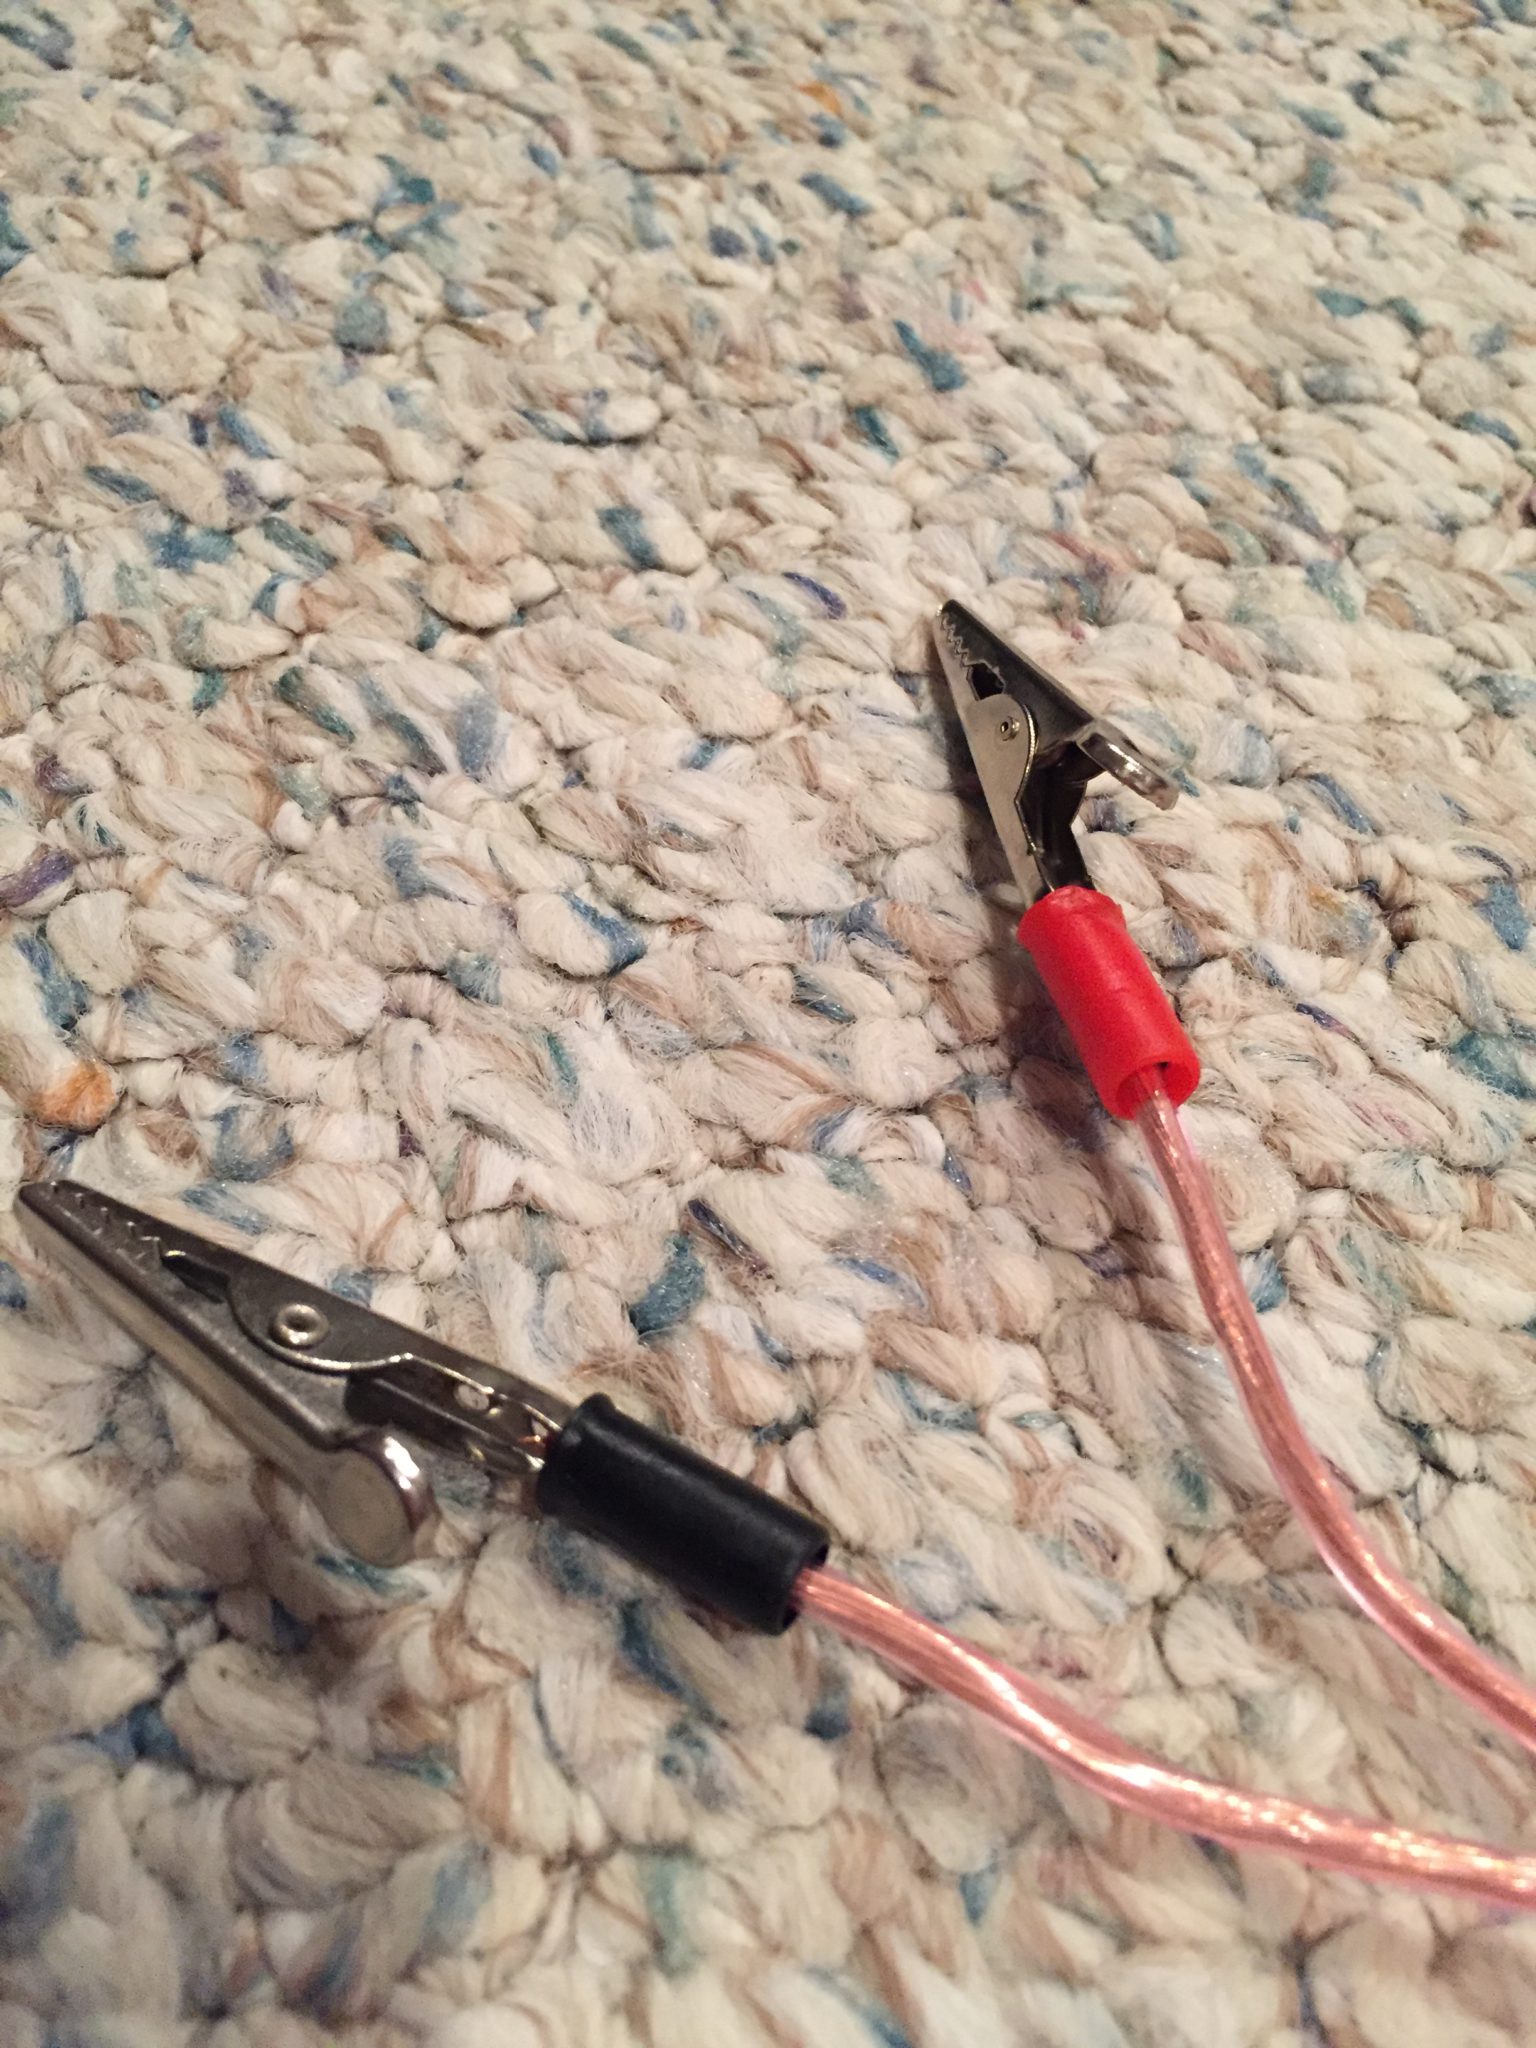
And some alligator clips:
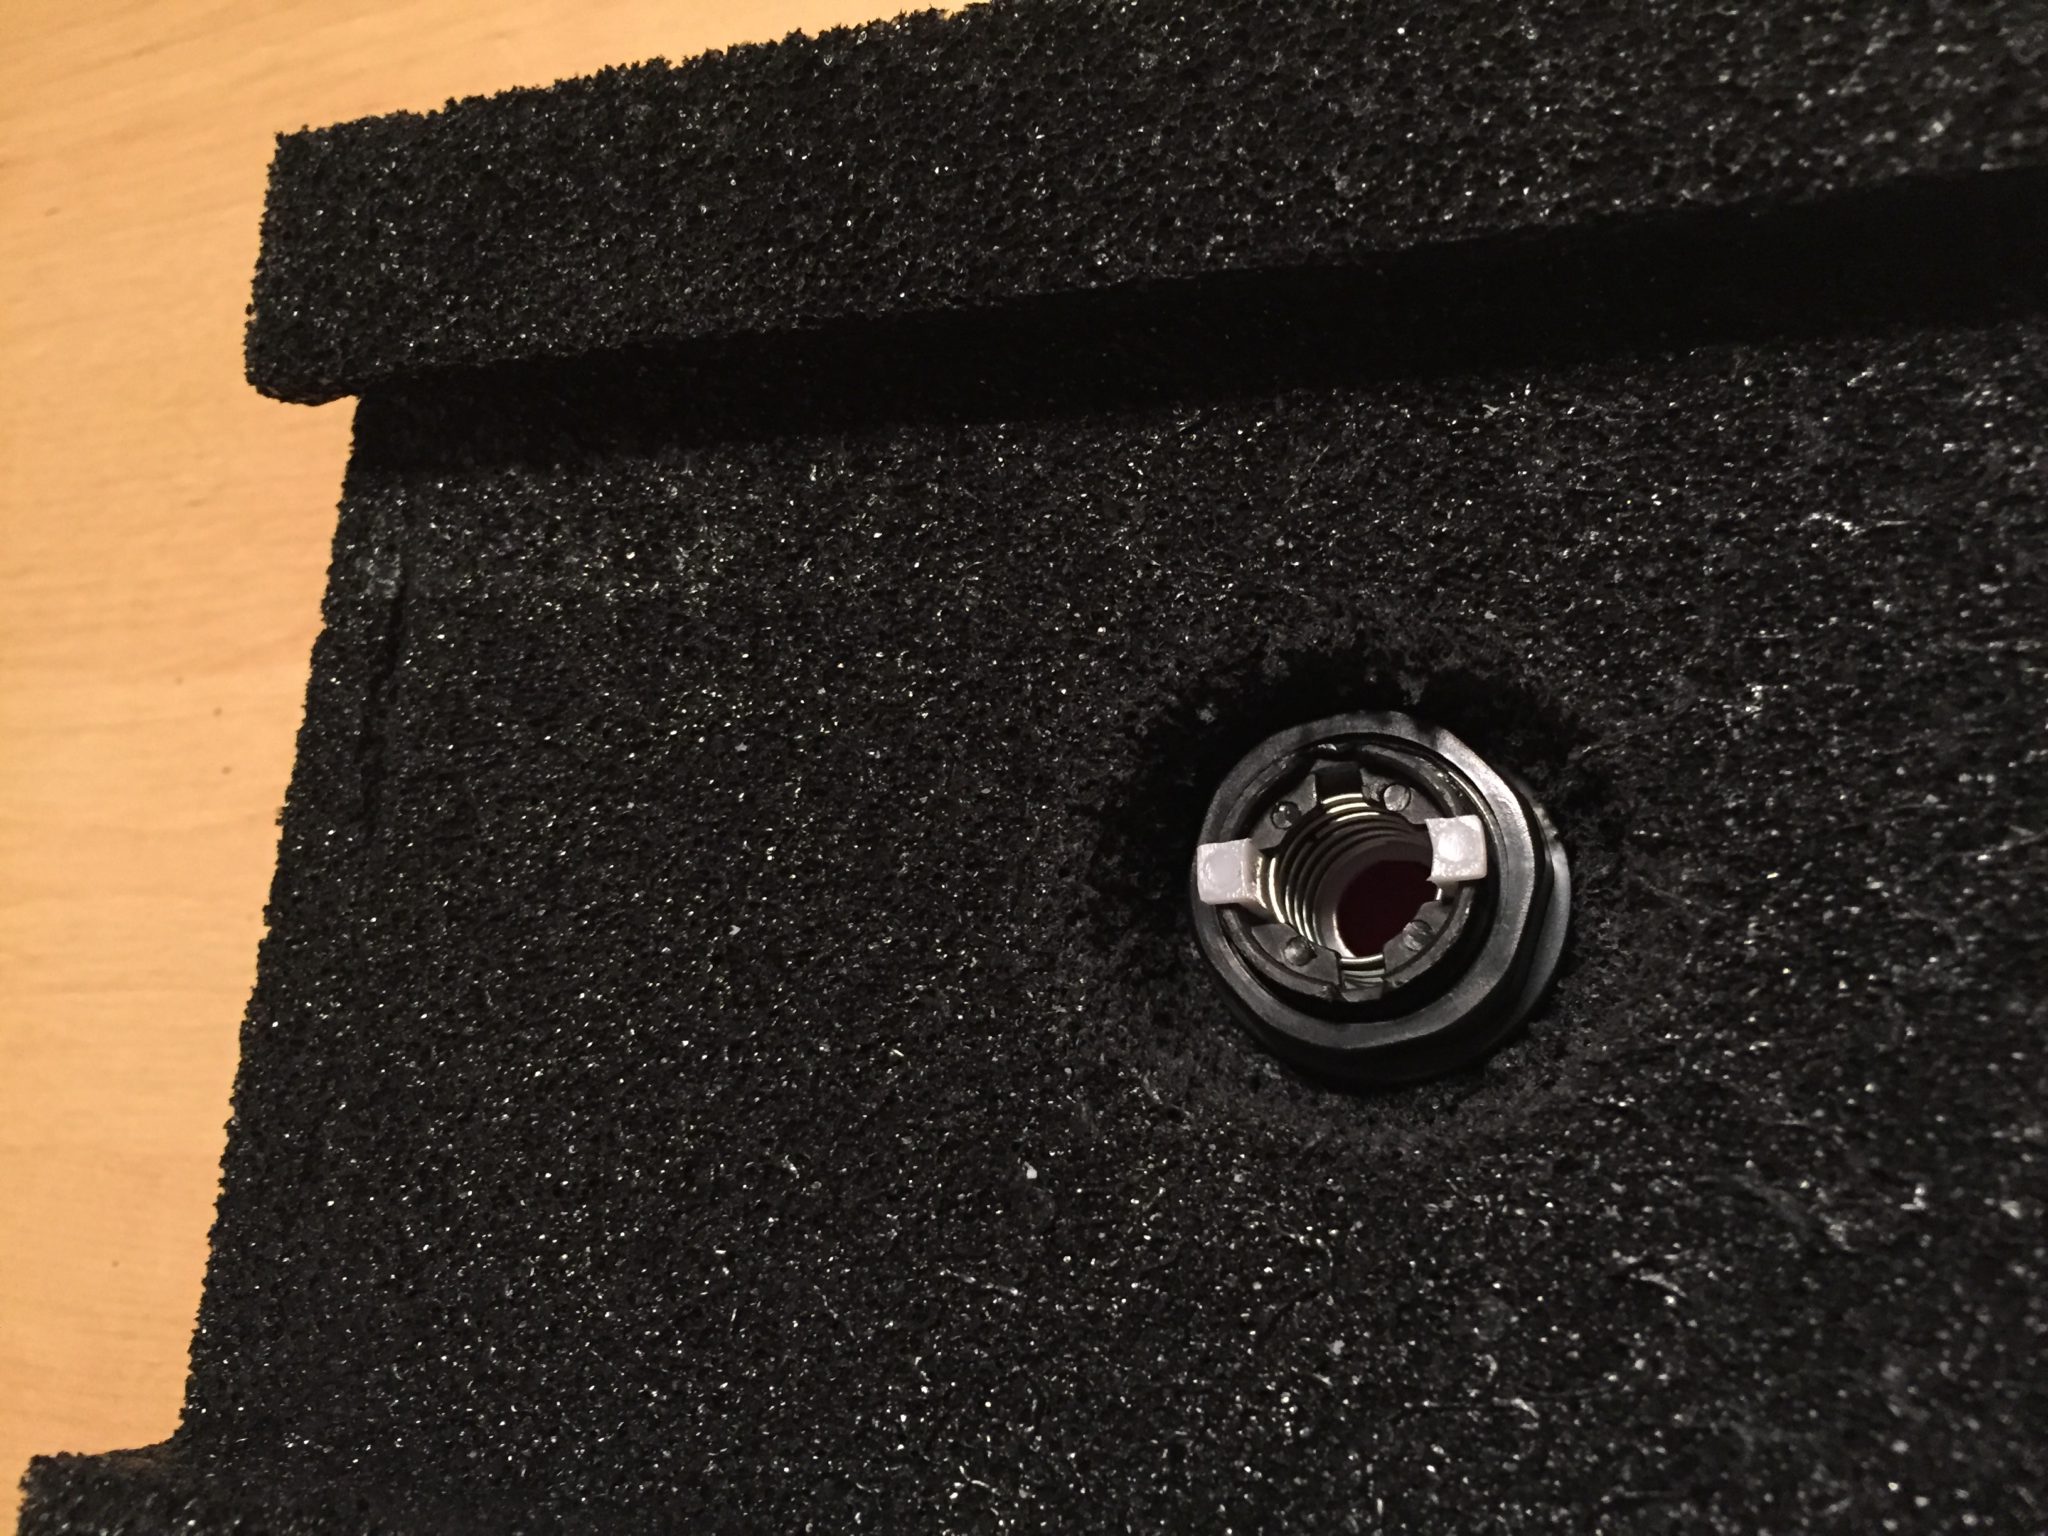
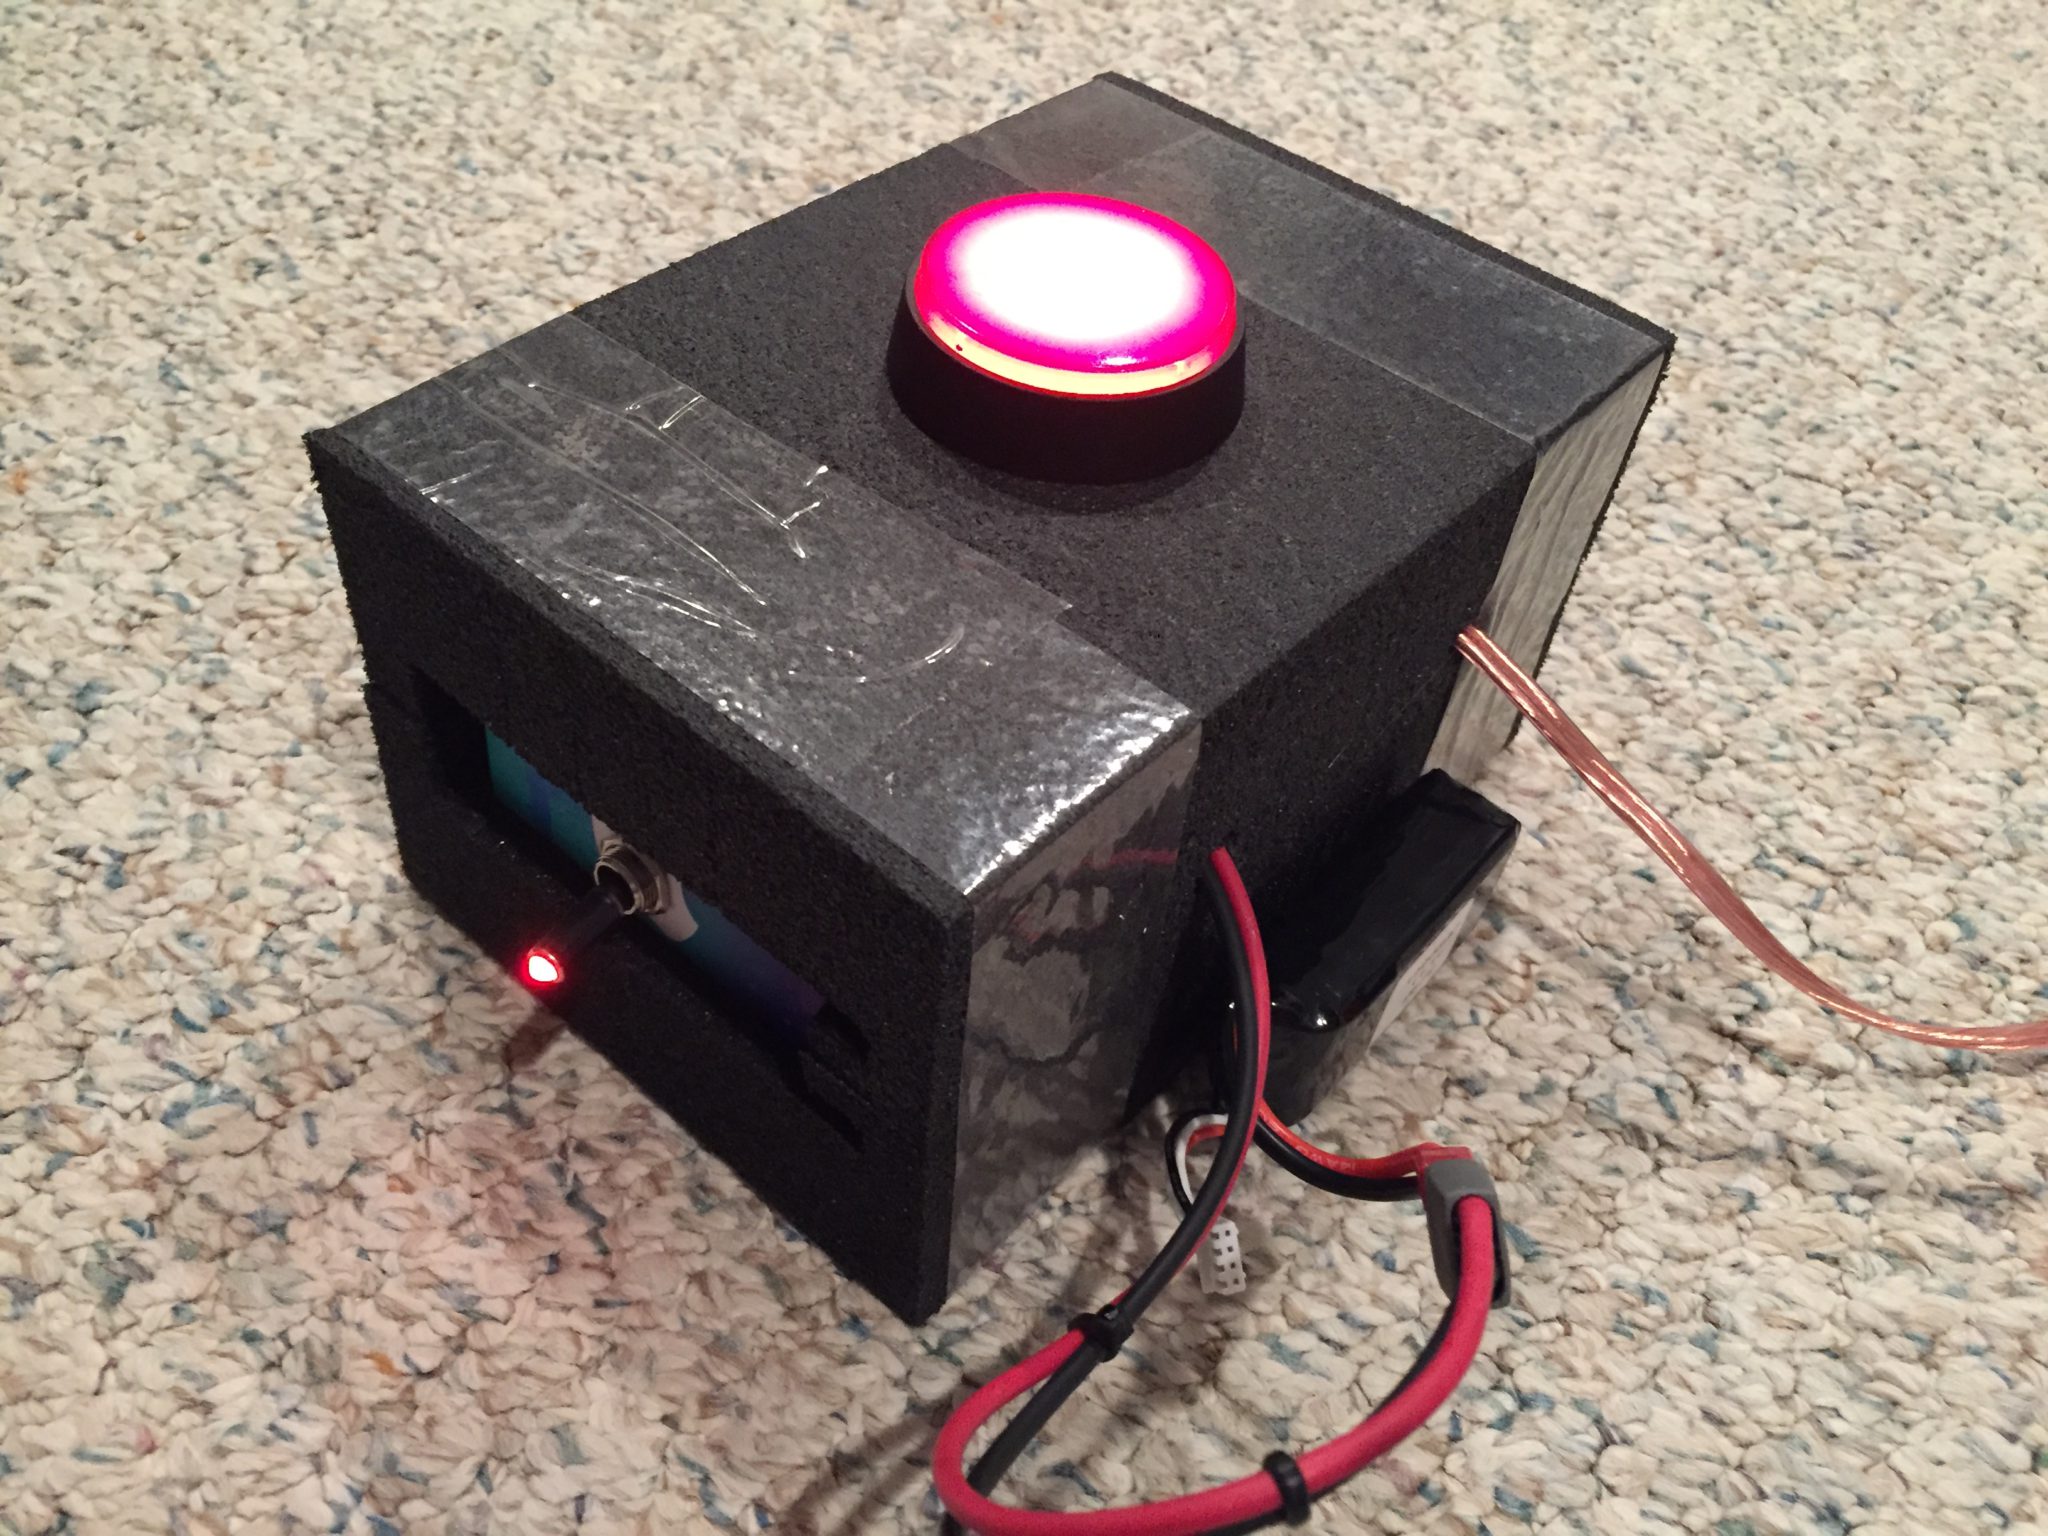
The foam blocks (despite being made of foam) are very rigid. It’s hard to see in the above photo, but they have a cut-out in the bottom, so I could just sandwich two together to create a box, and the wiring would have space to live in between the two halves.
I drilled a hole in one block for the big red launch button. The foam is thick so in addition to drilling a hole for the button, I had to drill halfway through with a hole saw bit to provide space for the fastening nut:
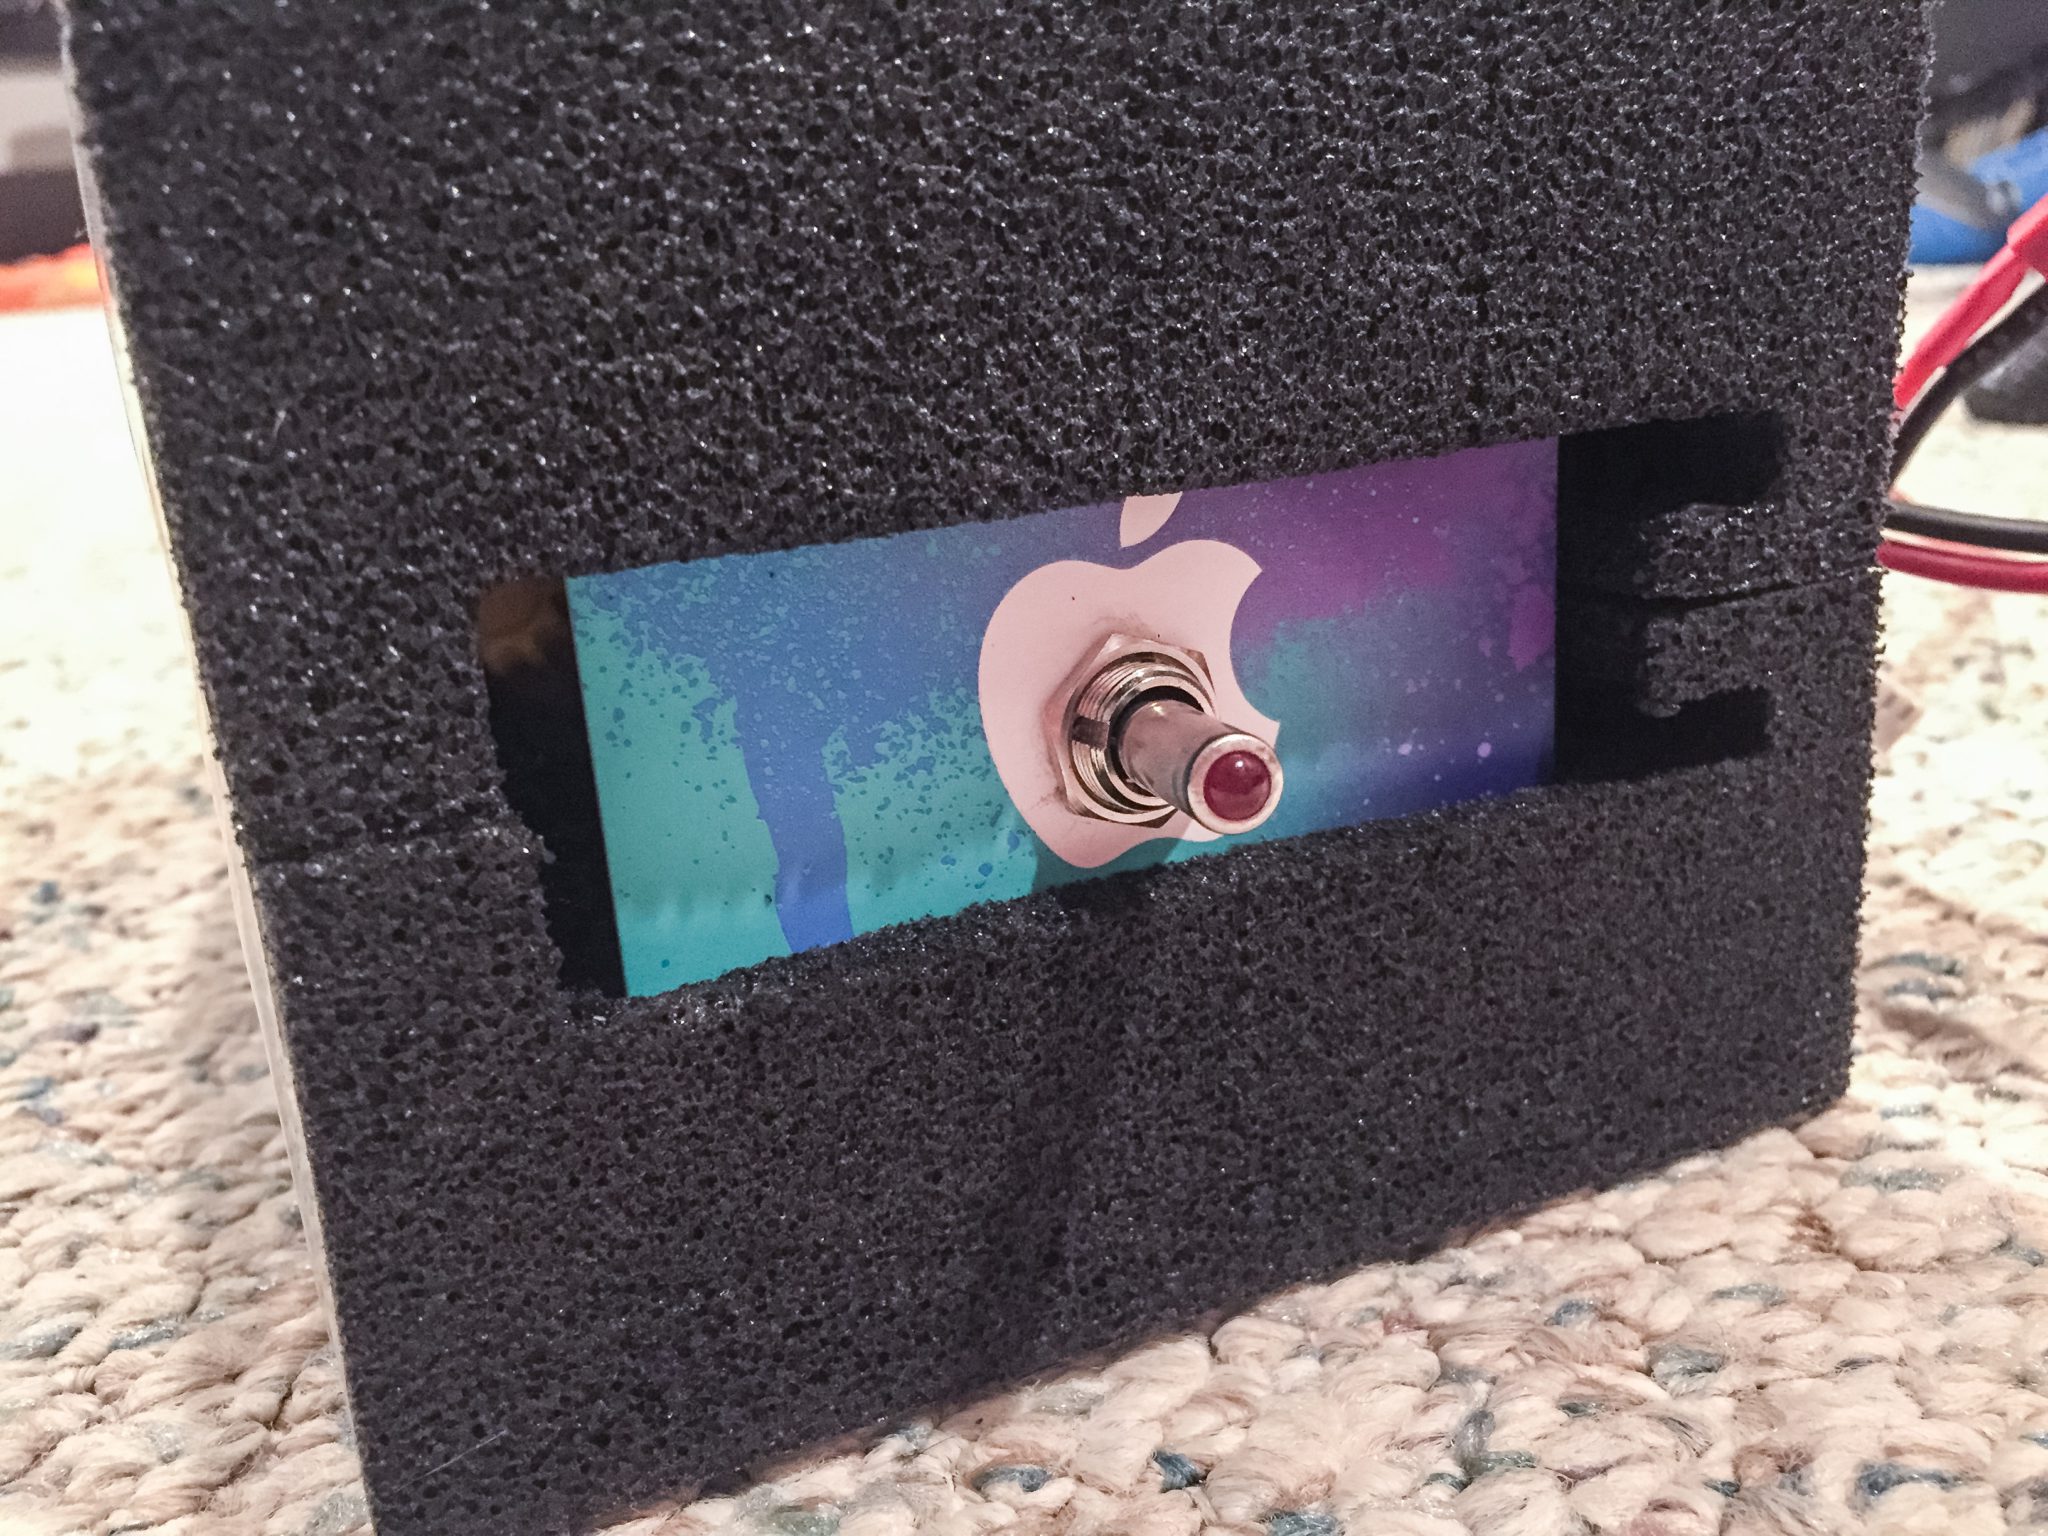
To mount the master switch, I used a hobby knife to cut a slot in the underside of the foam blocks about 1/4″ away from the edge. Then I placed an old gift card into the slot:
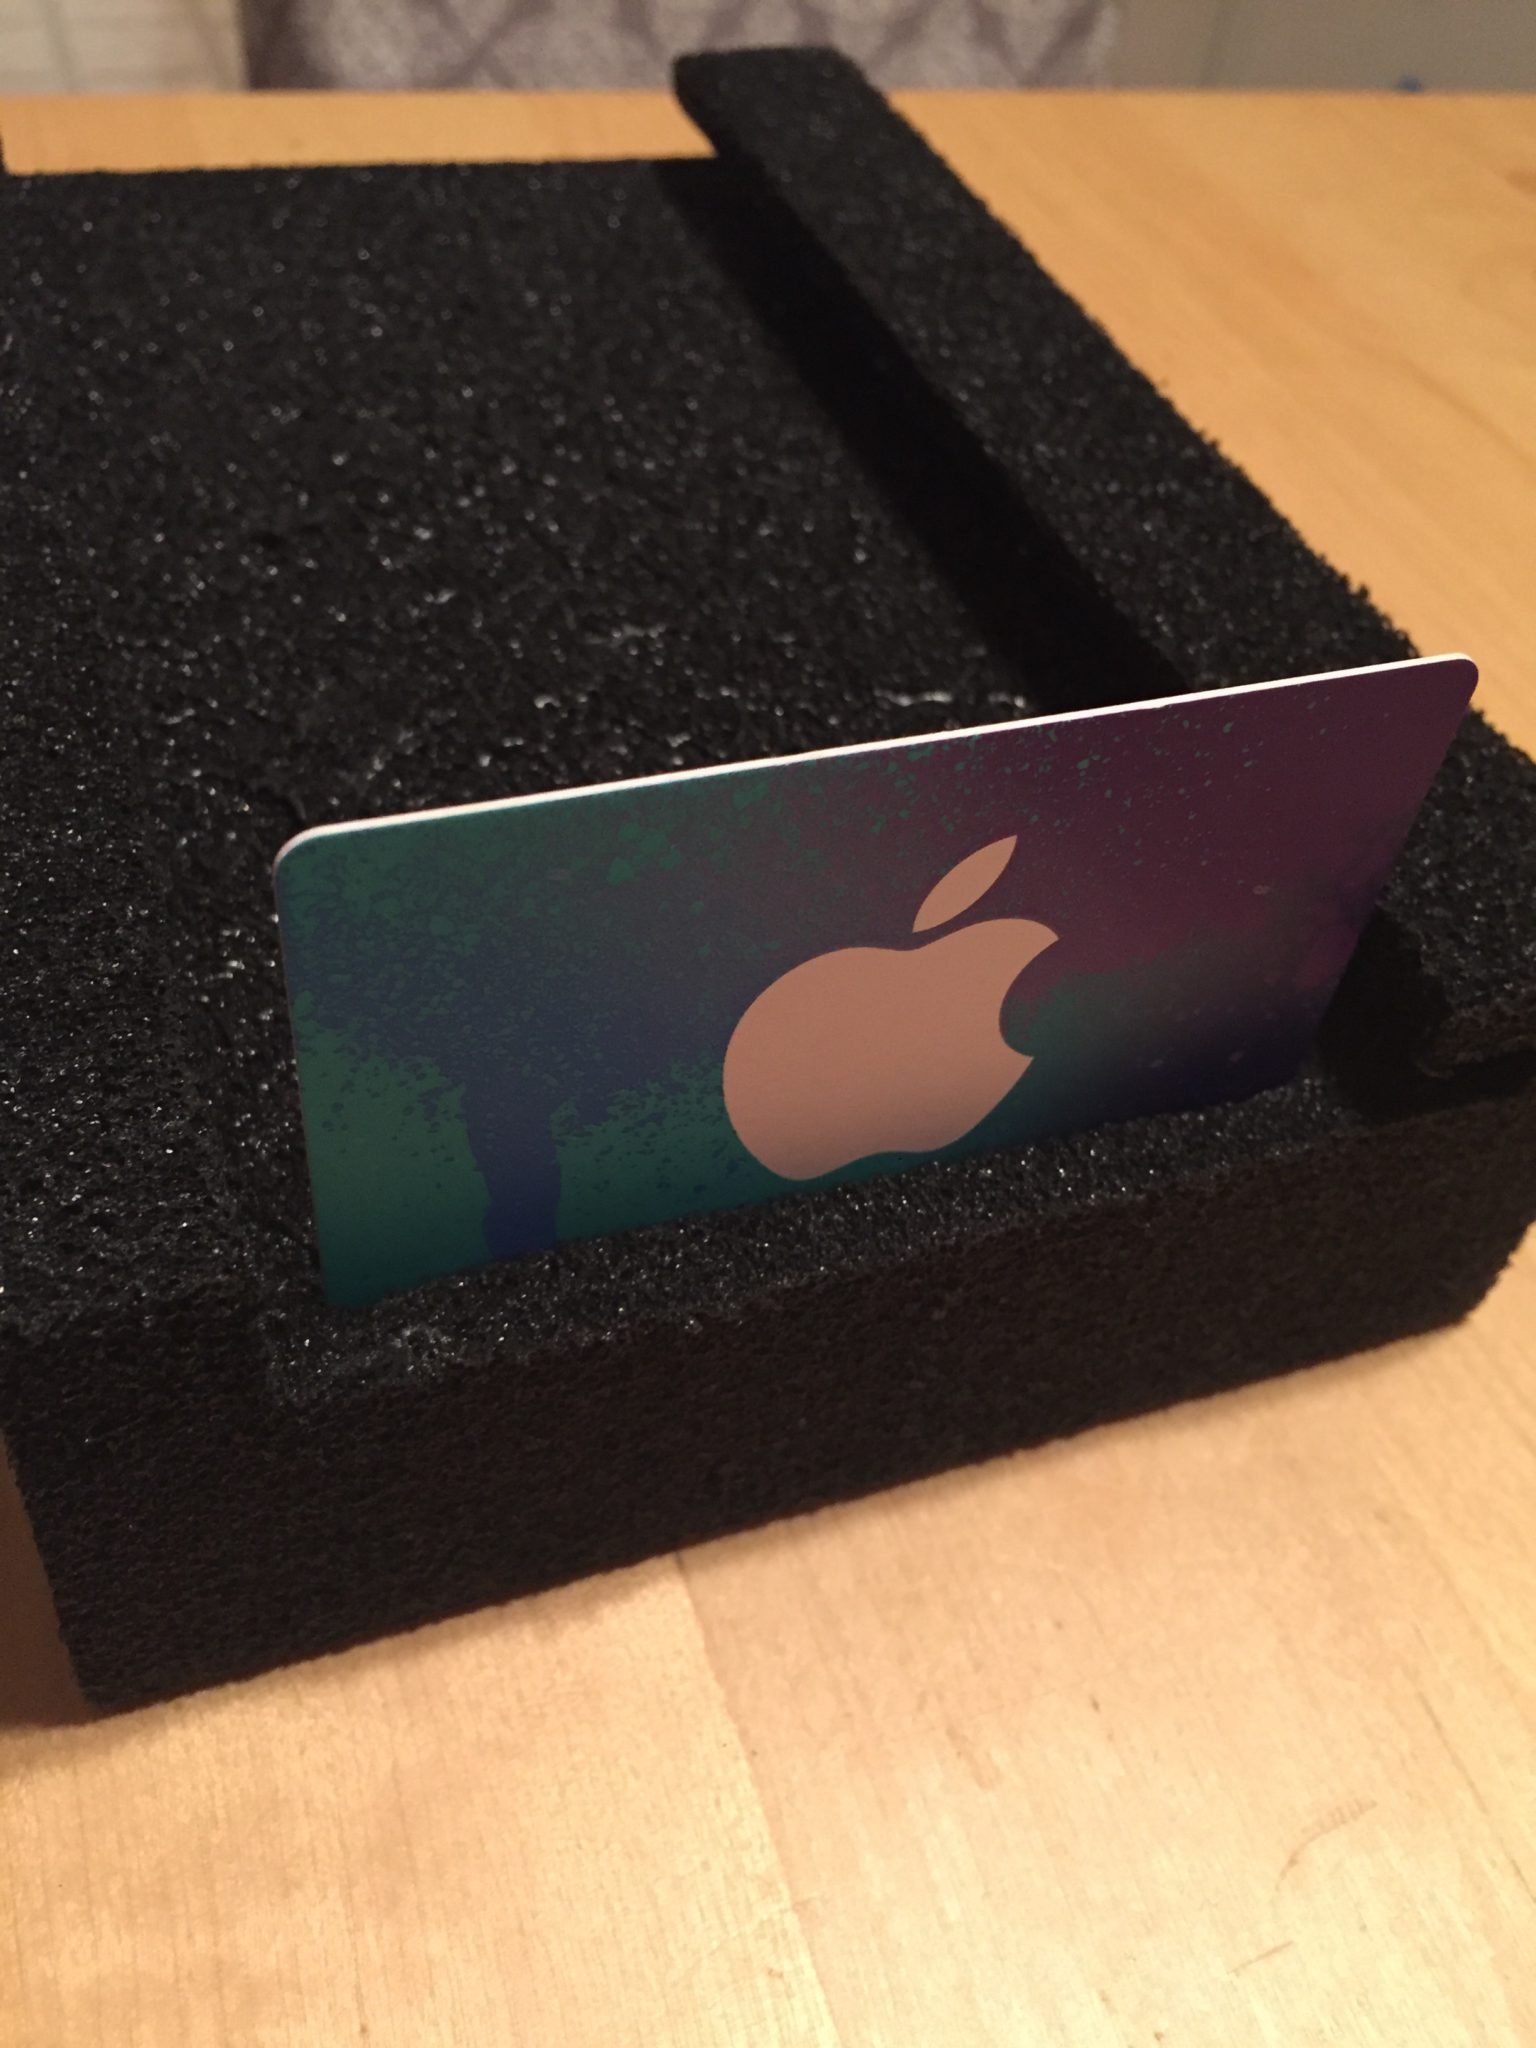
I drilled a hole in the gift card to mount the master switch, once the top foam brick is added, it’s rigid enough to hold the switch in place nicely.
I wired it all up using solderless terminals using my crimping tool. Here’s a rough schematic of what I did. Each light & switch are a single unit despite how they’re represented in the schematic. Also I did not use a breadboard, just some wire nuts for the common positive and negative points.
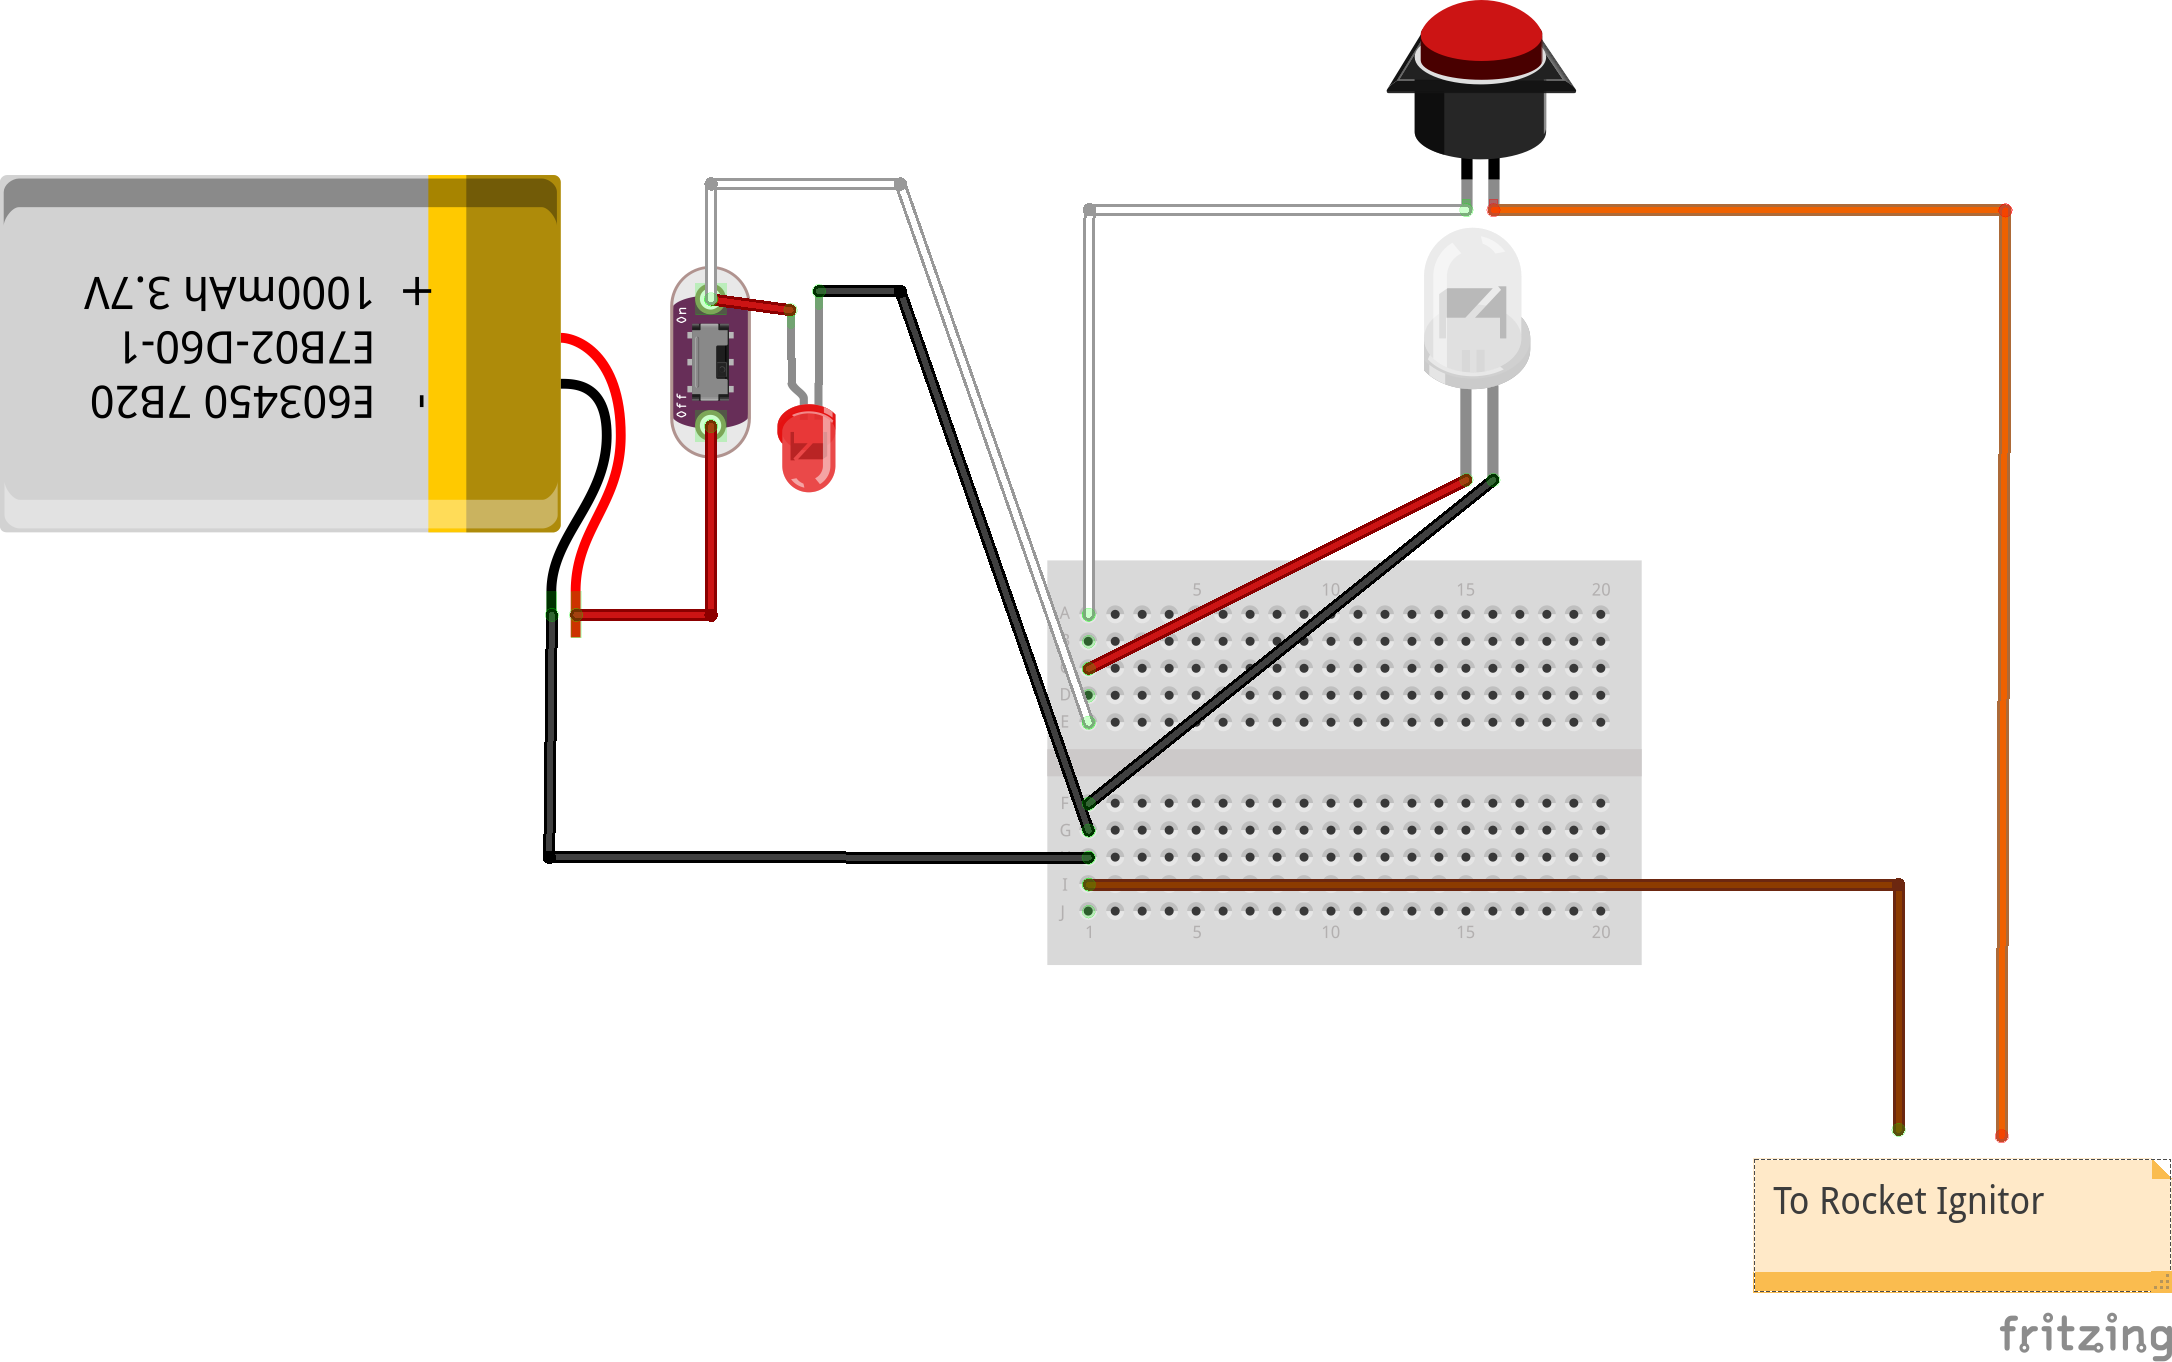
For the battery, I used a 3-cell lithium battery from a radio controlled airplane (which is around 12v), and fastened it to the box using velcro. You may just want to use a 9 volt, an old-school lantern battery, or your car battery if you don’t have a means to charge lithium batteries. Since I used crimp connectors and wire nuts for almost everything, the only soldering I had to do was for the battery connector for my special lithium battery.
I just used some packing tape to sandwich the two foam blocks together to make a “box.” It holds well and taking it apart for service will be easy. It turned out pretty awesome I’d say:
Launch Pad
Materials:
- Scrap wood
- 1/8″ steel rod – 36″-48″ long
- Metal for blast deflector – a canning lid works well
Tools:
- Saw
- Drill & bits
Again, I could have just bought the Estes Launch Pad, but a launch pad is super simple to make at home from stuff you may already have. Just make sure you have a wide enough wooden base so it will stand level in the grass. I made mine from two 12″x12″ pieces of plywood glued together. Drill a hole into the wooden base to insert the guide rod into. Drill a hole in a piece of metal to use as a blast deflector, and put it all together.
I used a piece of flat steel that is absolutely overkill for a model rocket pad. You could launch scud missiles off of this thing without issue. Pro tip: if you’re using a big plate like this, hot glue the plate to the wood first (for convenience), then drill the rod hole so it’s perfectly aligned.
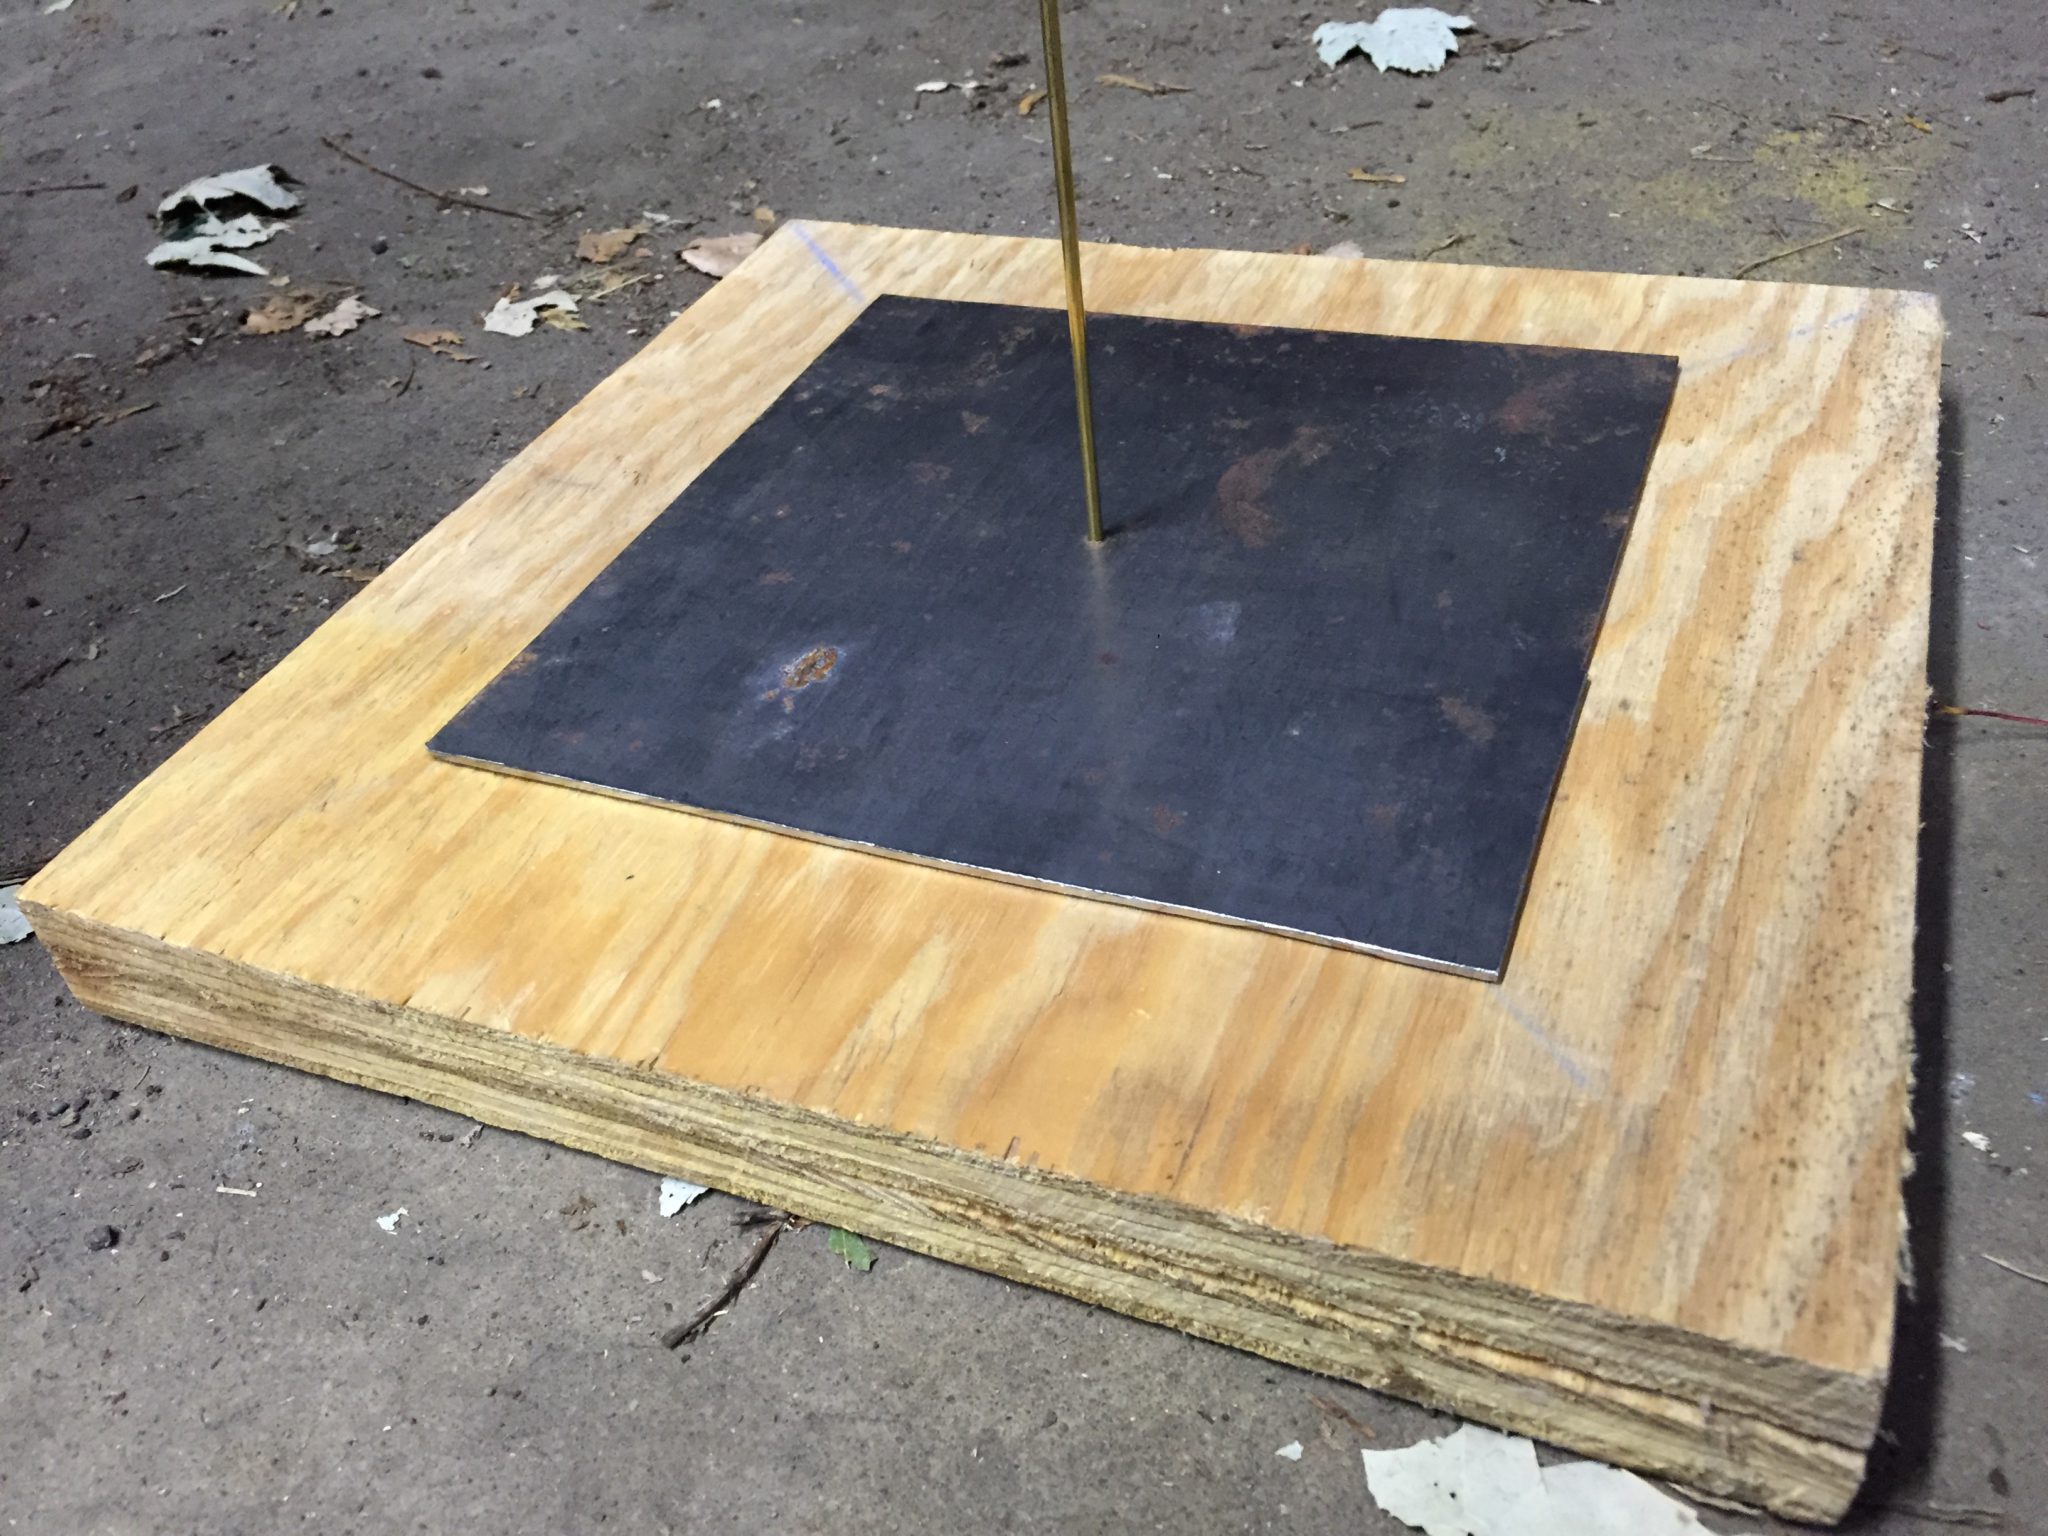
I would have rather just used a canning jar lid, but they’re highly sought after in my home for jams and pickles. You don’t need to glue it on, just drill a hole in it and drop it over the rod.
Now you’re ready for liftoff!
[…] on quads and planes is the XT-60 connector. So I decided to upgrade all of my cars and even my rocket launcher to […]