Like RC Adventures (RC Sparks) I live in a cold weather area – the grey, blustery north that is Minnesnowta. This winter, rather than only driving at indoor tracks, I wanted to conquer the elements with a usable setup for bashing outside with our 2wd Slashes. My son Jules’ Slash is already set up with a set of 2.8″ Pro-Line Trencher tires ala AMain’s Monster Slash setup. To give us the ability to mix-and-match, I followed DJ Medic’s lead by purchasing some 2.8″ Pro-Line Masher tires:
Well… it turns out that the Mashers by themselves aren’t great in the cold:
I should have seen this video before I purchased, but I hadn’t 🙁
Other Setups
I’ve also tried a Pro-Line Sling Shot paddle tire and Mohawk ribbed tire setup. They’re good on densely packed snow but anything deep or fluffy and you’ll just dig in and get stuck.
A Usable Setup
While indeed the Mashers by themselves perform pretty poor (traction wise) in the cold, they make a decent front tire on a 2wd vehicle in snow. And if you continue to watch that 2nd RC Sparks video, Medic constructs some snow chains for his tires.
Too Long; Didn’t Read? Here’s what I arrived at:
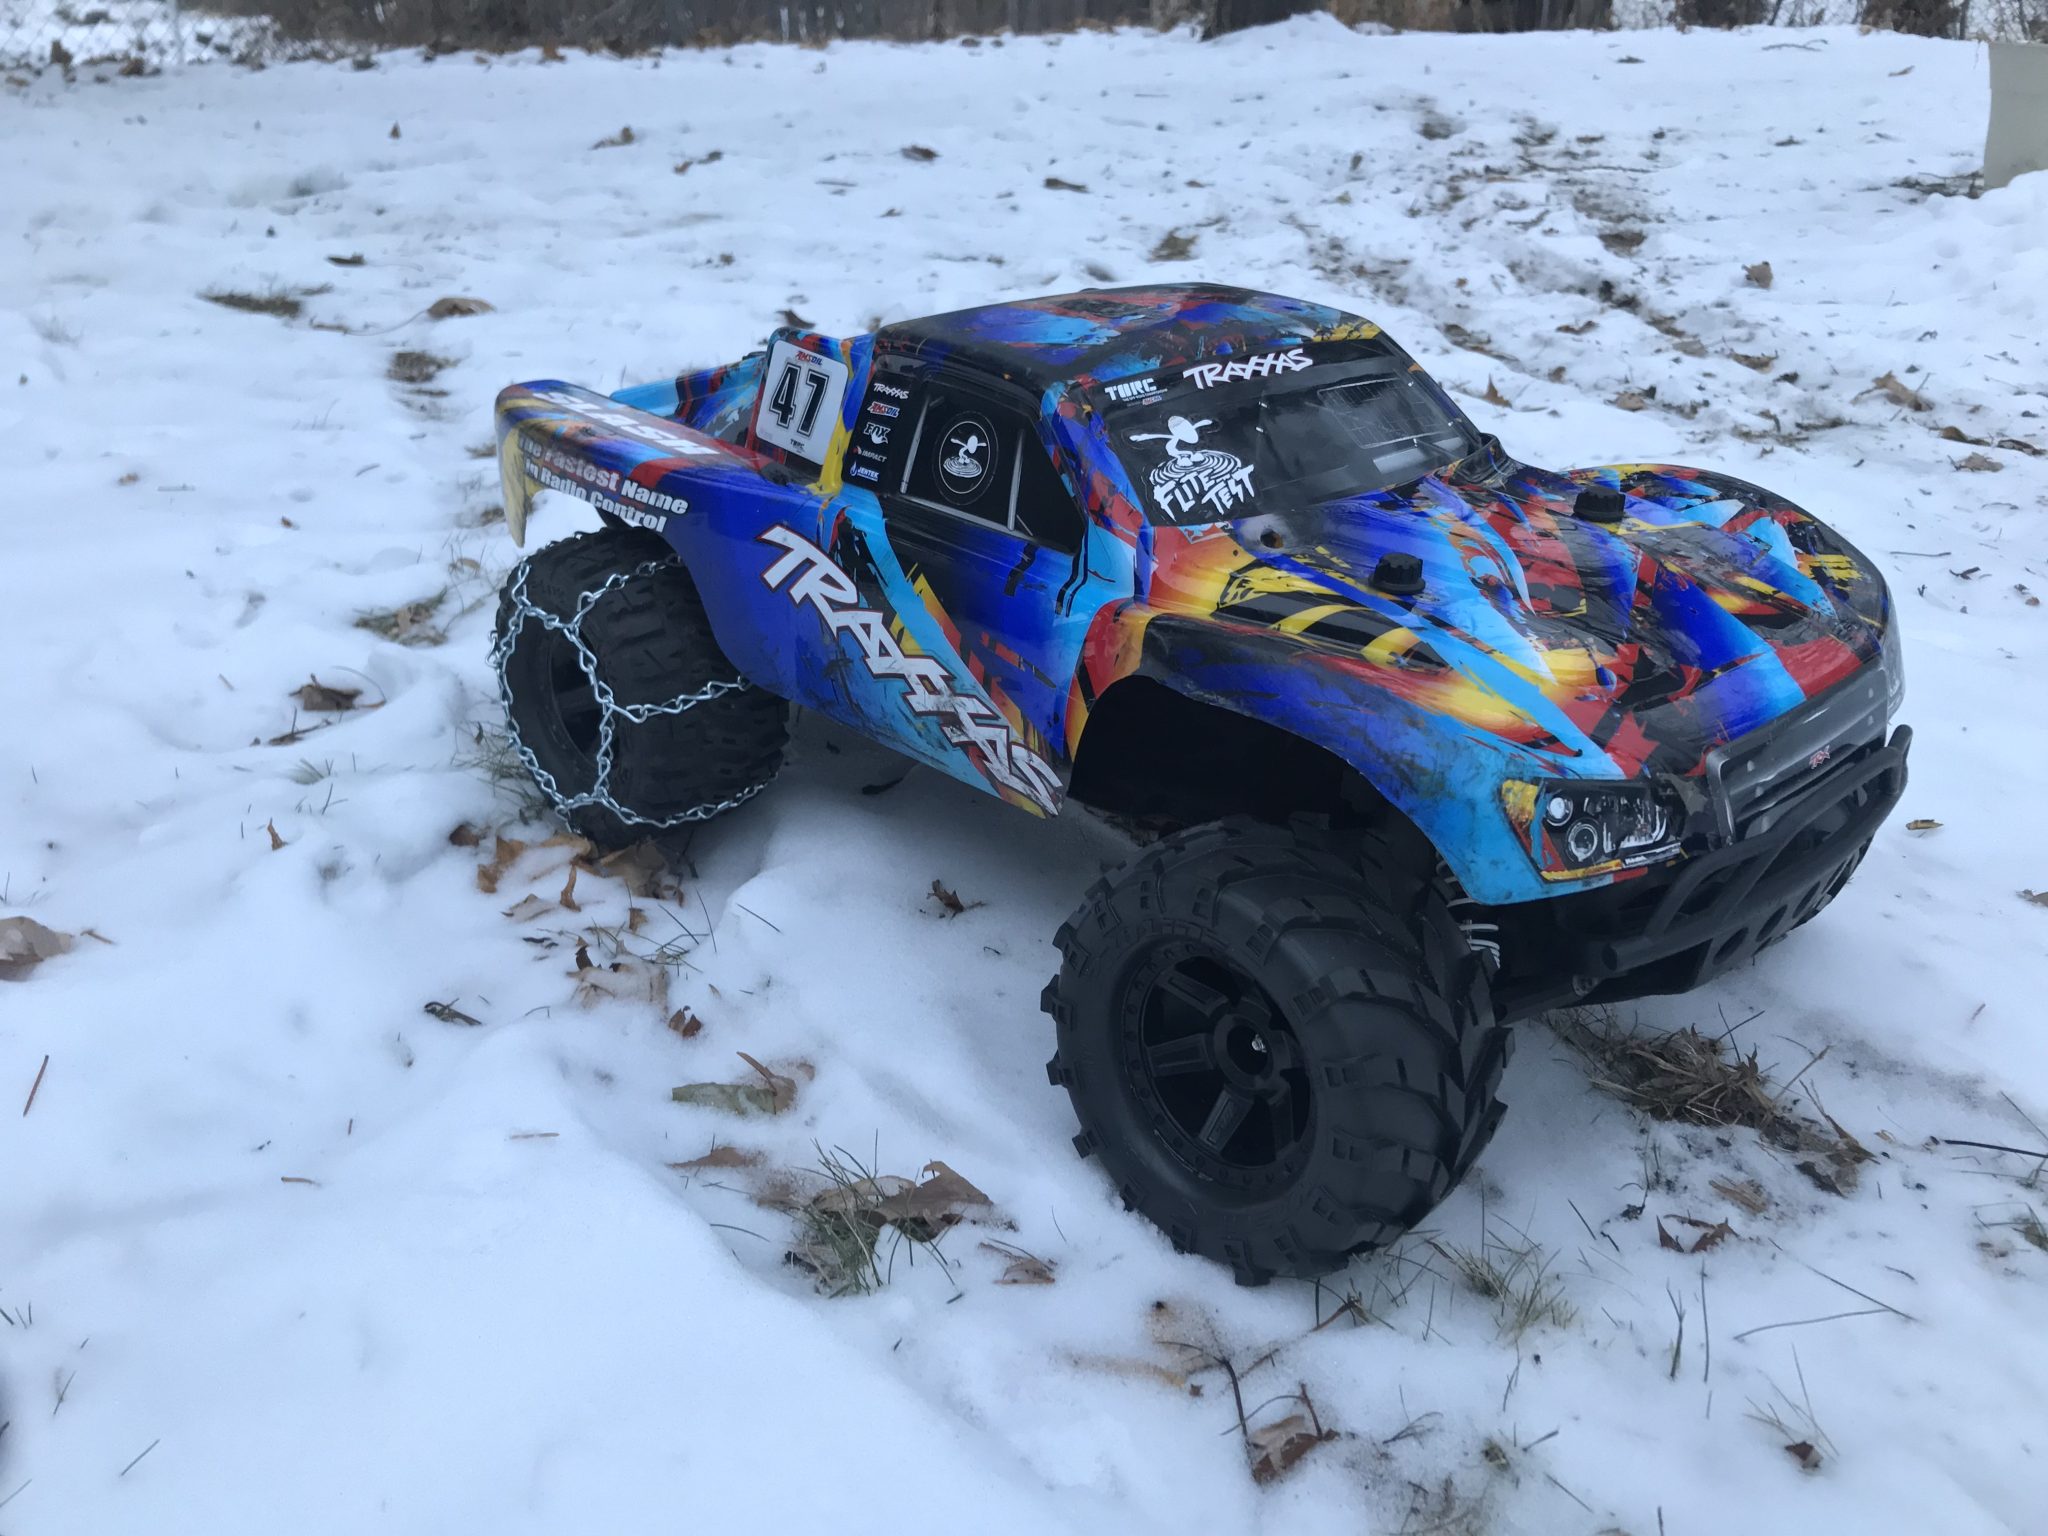
Trenchers in back with chains, Mashers in front facing the “normal way.”
This set up works great for two 2wd Slashes. If you’re going to buy just one type of tire for one vehicle, go with the Trenchers. They are all-around great and you can add chains for the snow. This would probably also work great on a 4wd Slash with chains all-around.
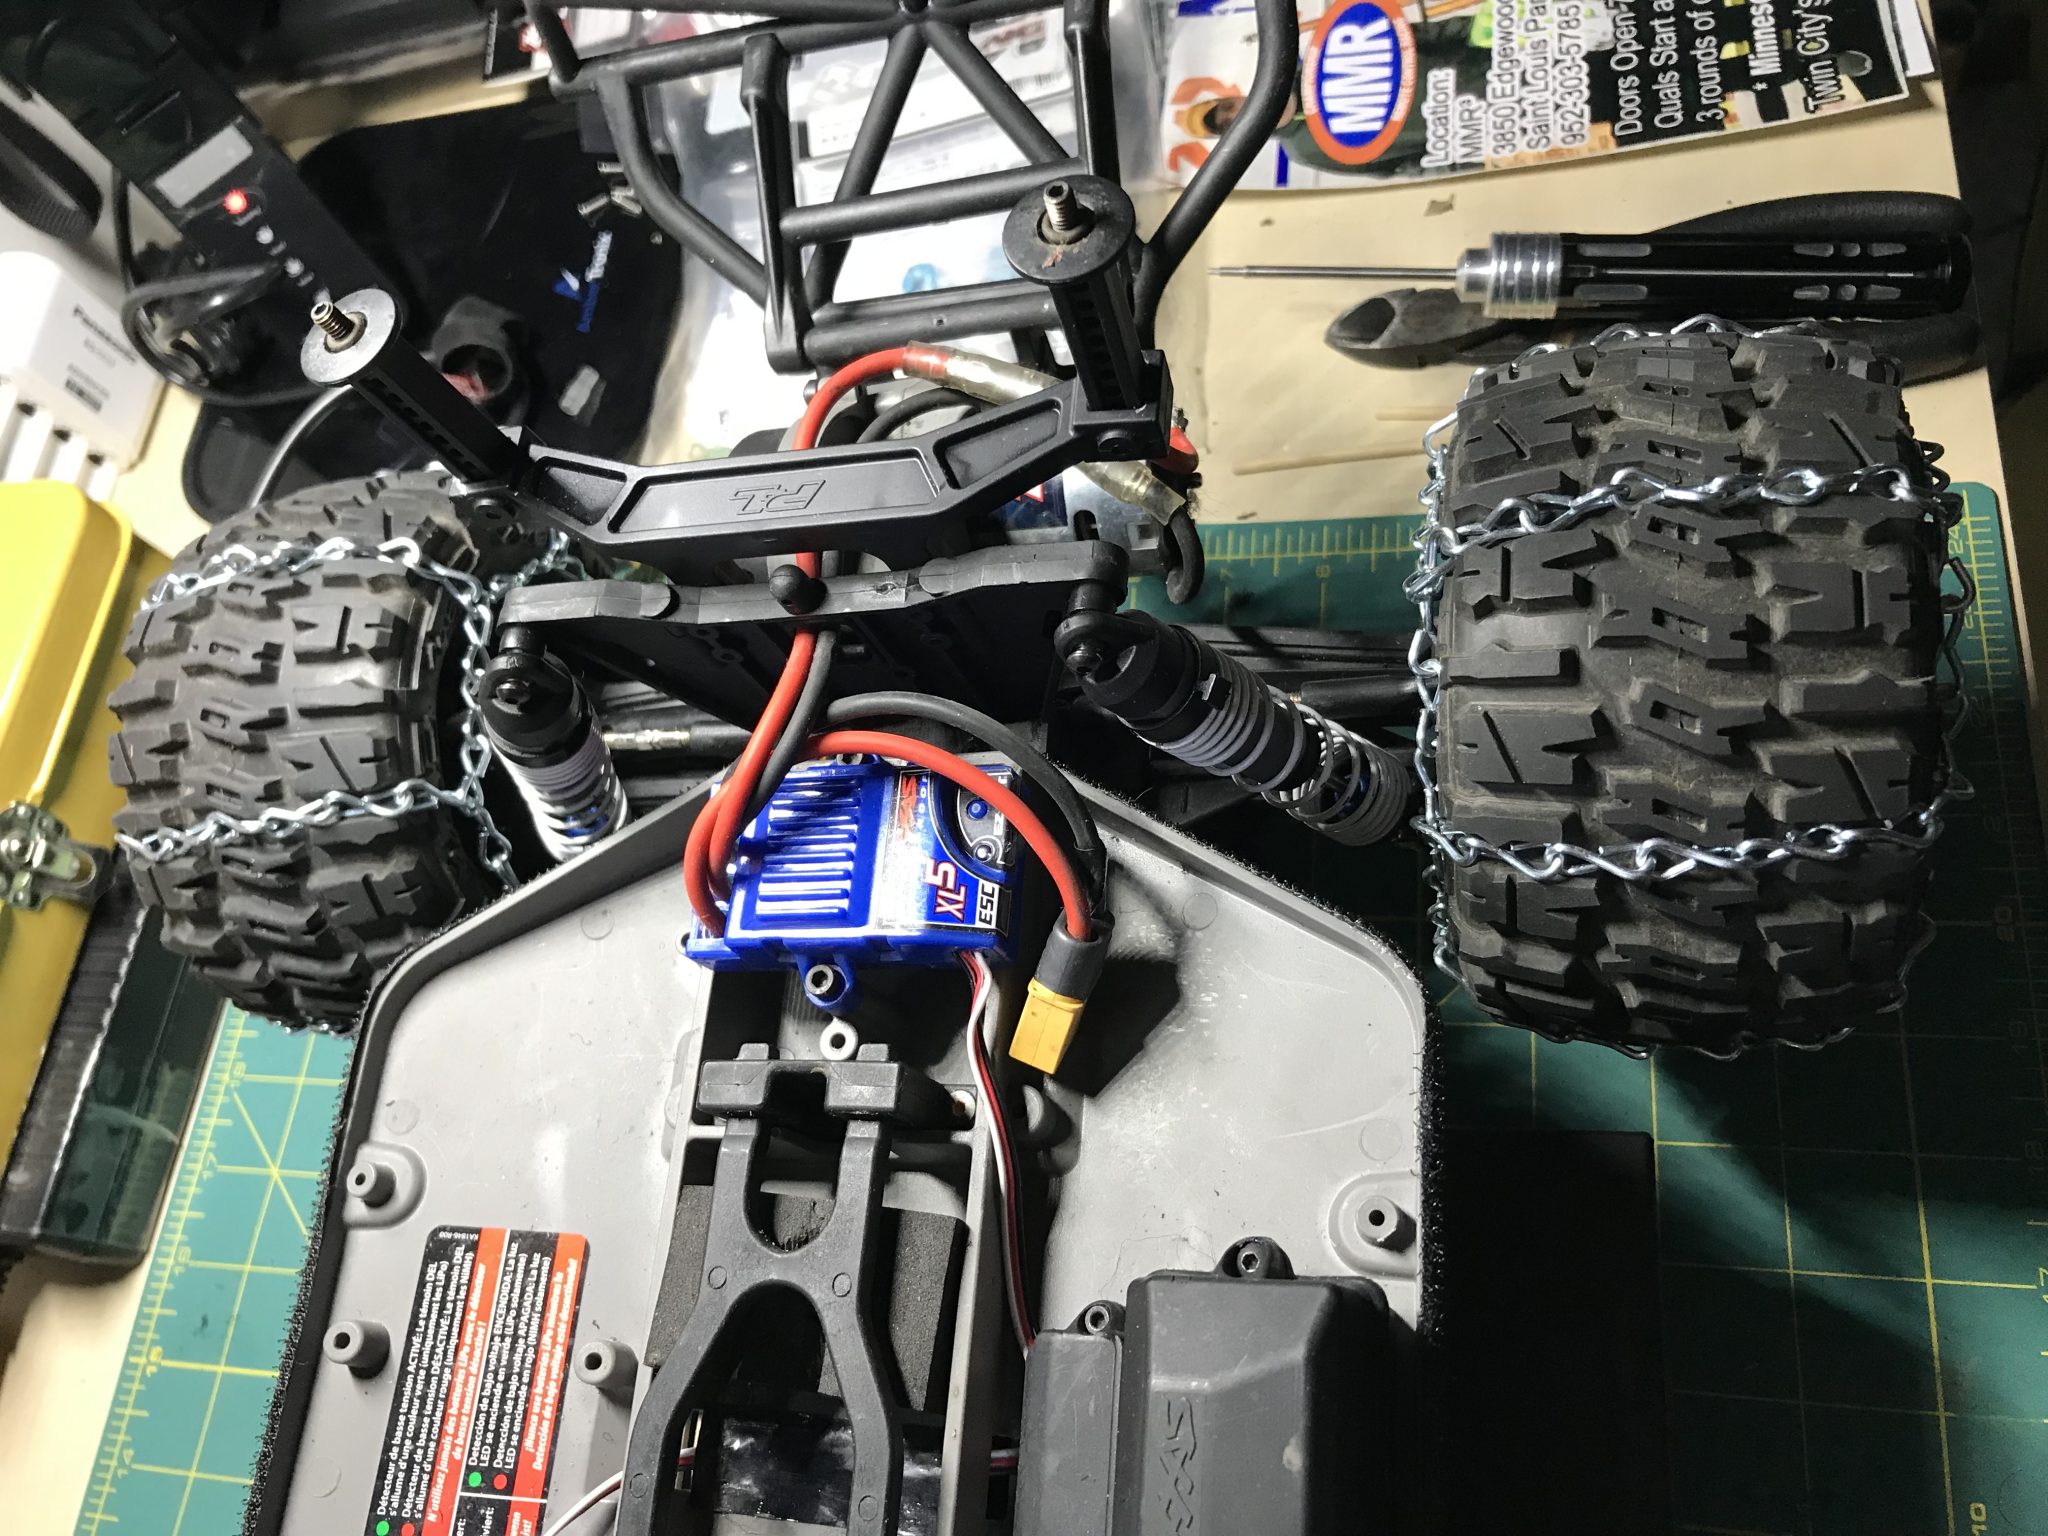
2.8″ Trencher Tires with Chains
To make tire chains for the 2.8″ Pro-Line Trencher tires, I went to the hardware store and purchased 8 feet of #12 single-jack chain. It was $1.39/ft. so about $12 to cover 2 tires. Double the length and cost if you’re doing 4. The only tools I used were a needle nose pliers, a side-cutter, and a clamp.
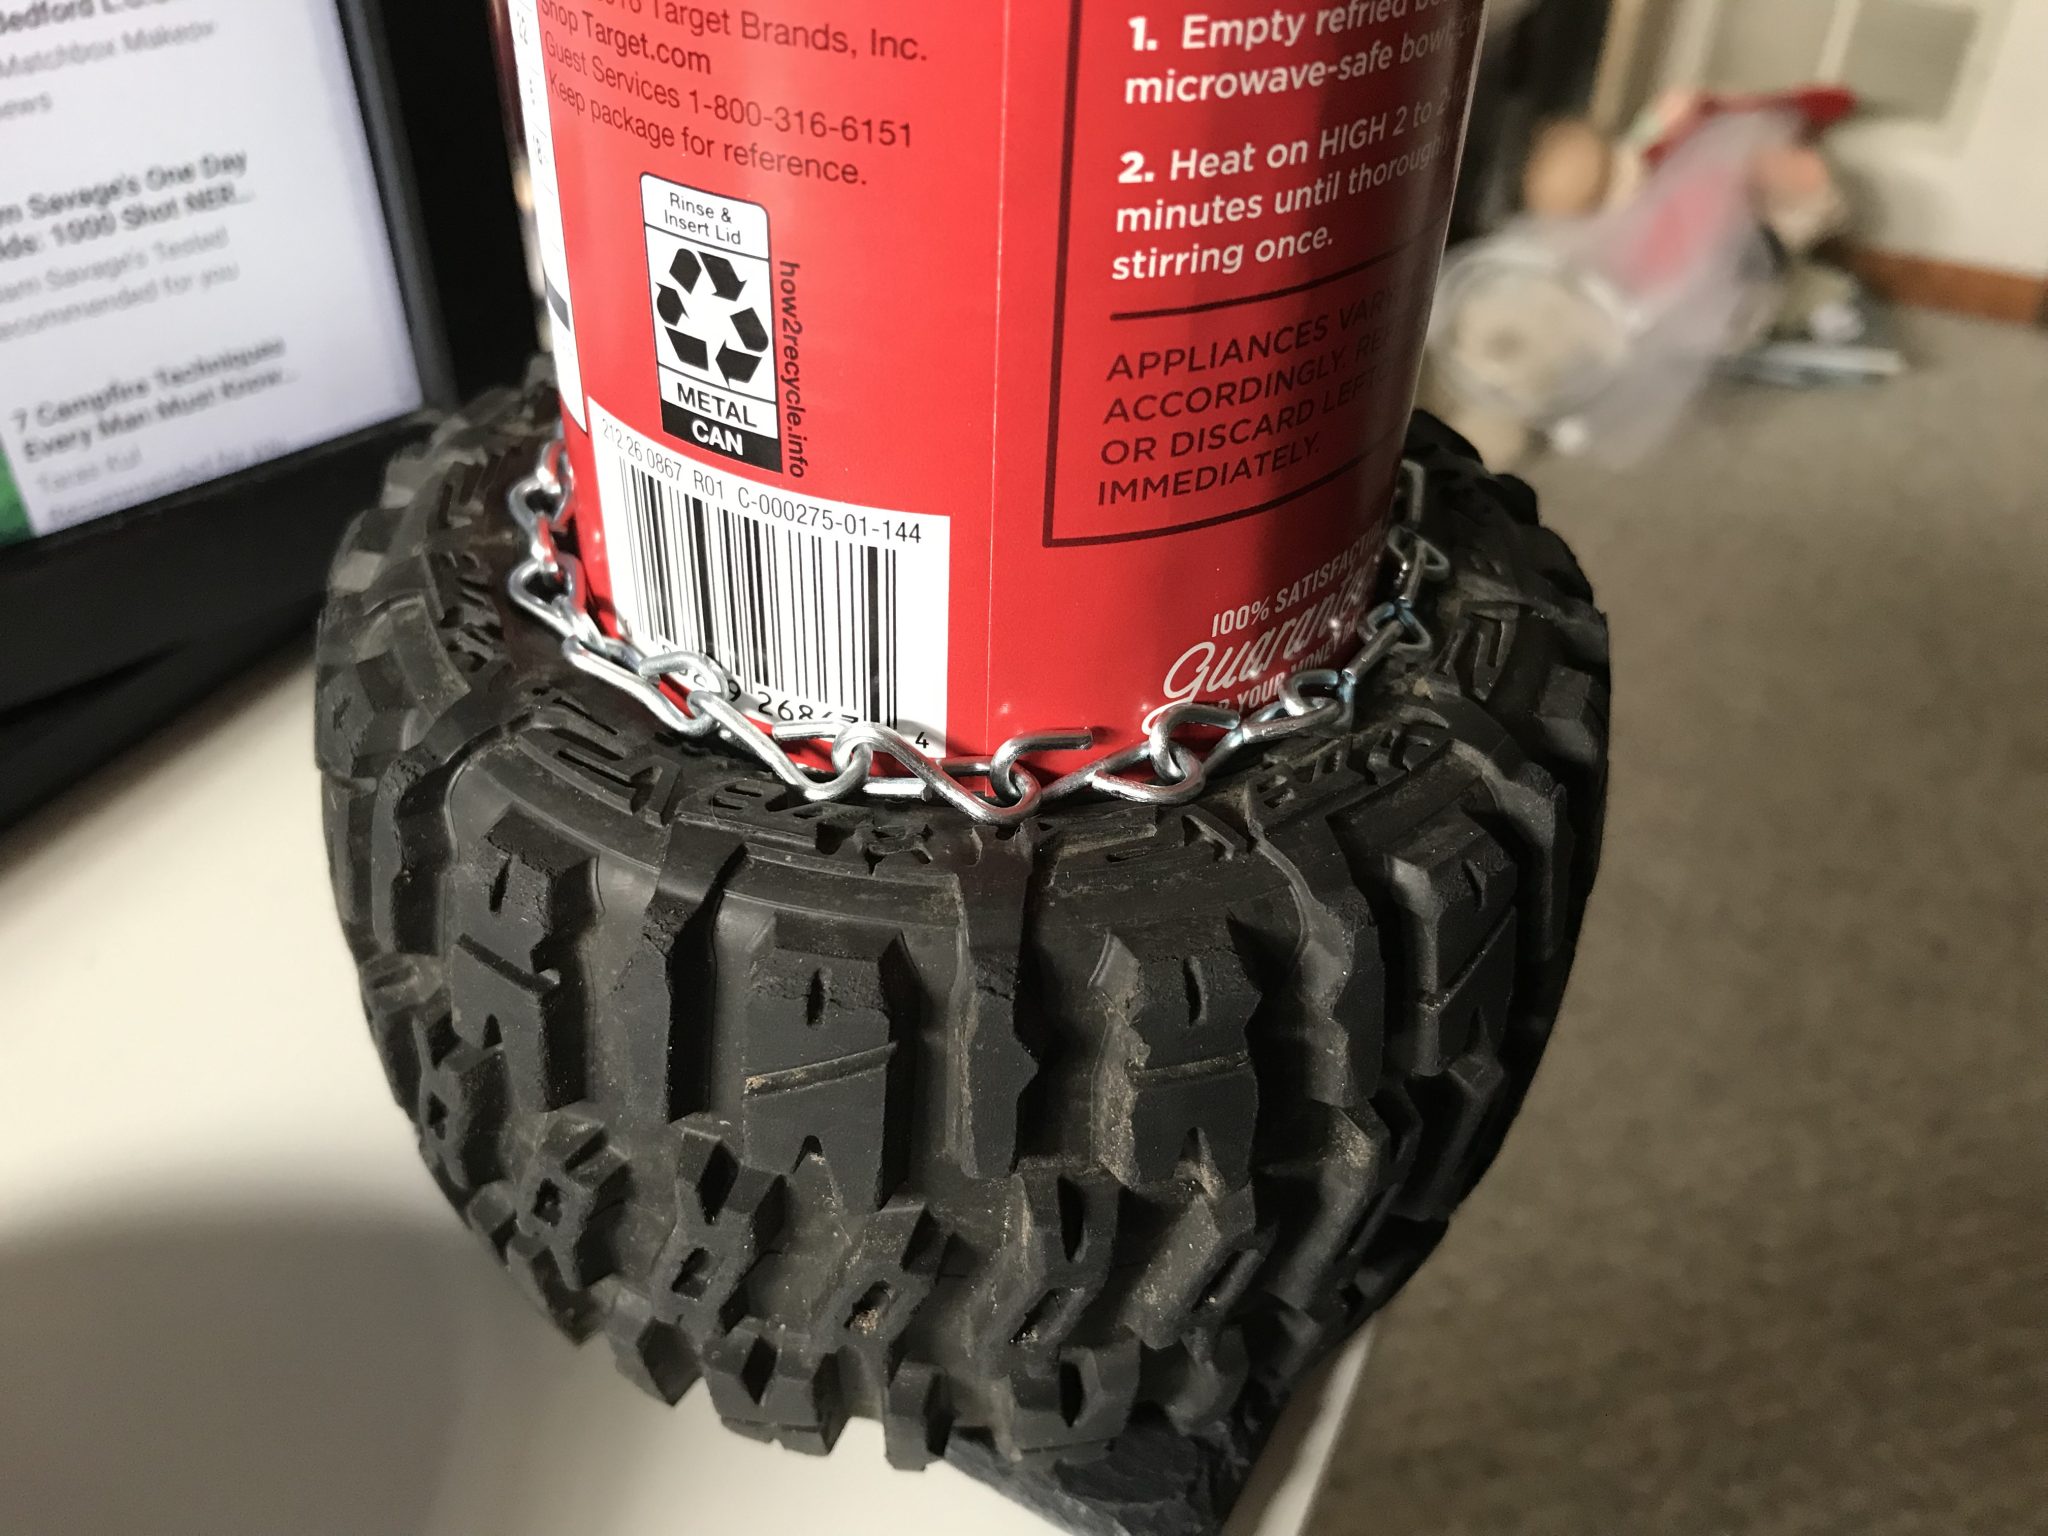
To start the build I constructed the rim chain. I wanted it to sit a little inside the sidewall lettering. To make it easy I found a can from the pantry that matched the size I wanted. I put it in the middle of the tire and draped the chain around it. I opened the link at the size I wanted and kept it open – this will be how the chains are hooked on and off. In total I made 4 rim chains to cover the inside and outside of the two rear tires:
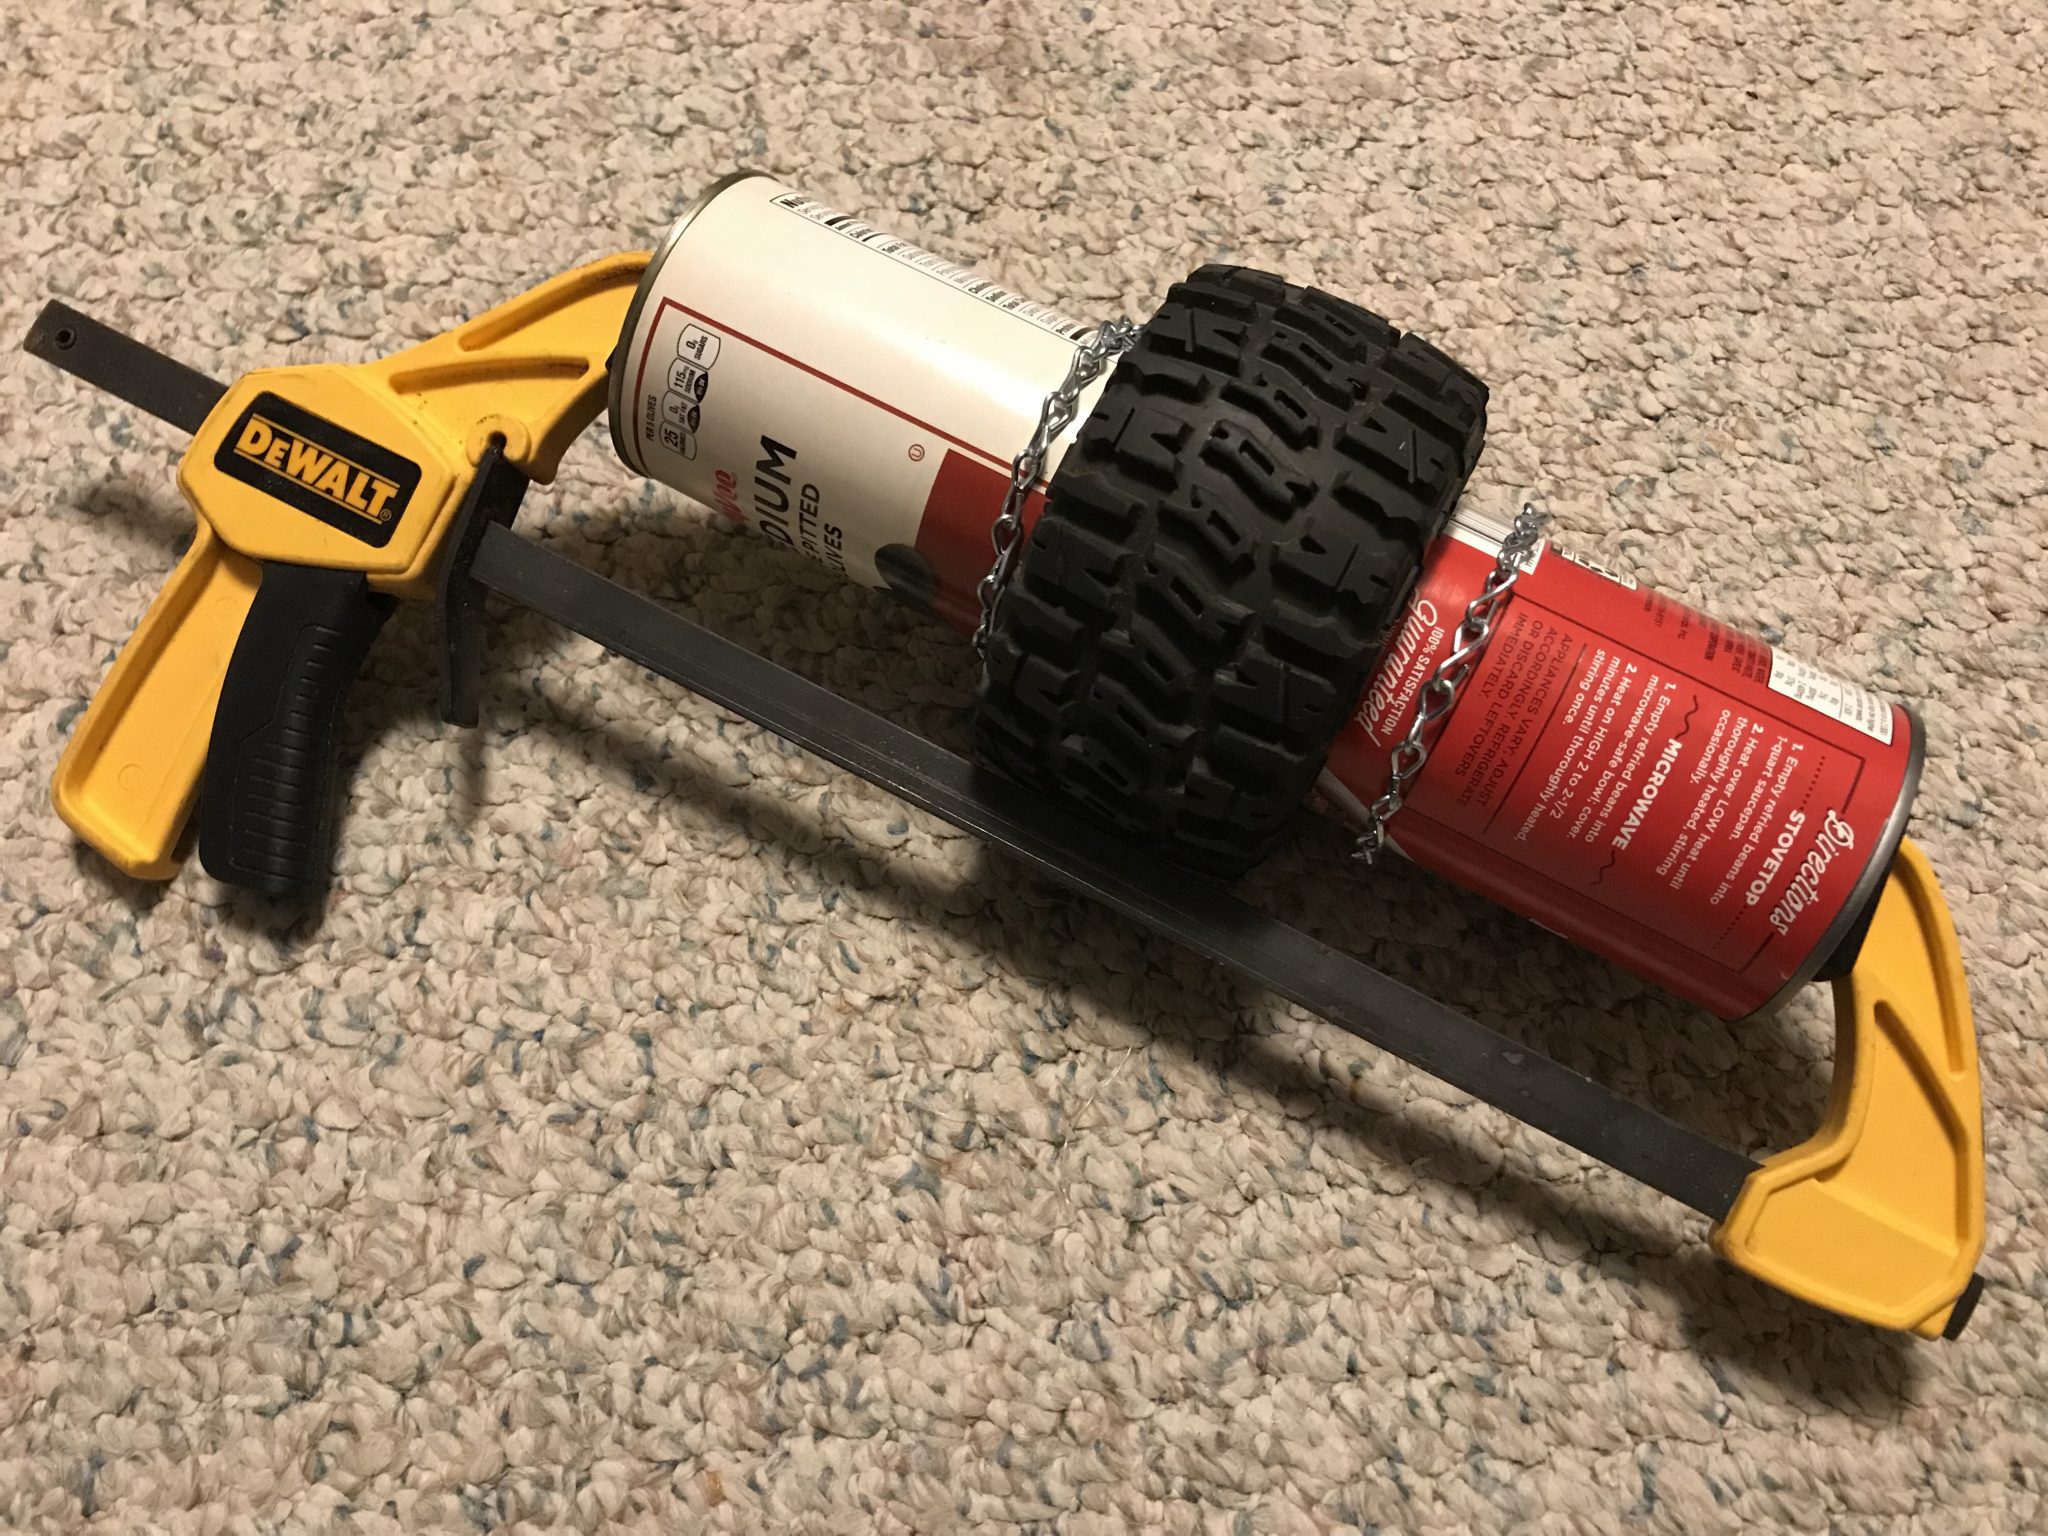
To measure and construct the cross chains that go across the tread, I needed a clever way to hold the rim chains in place. I got another can of the same size, added both rim chains, and clamped it all together.
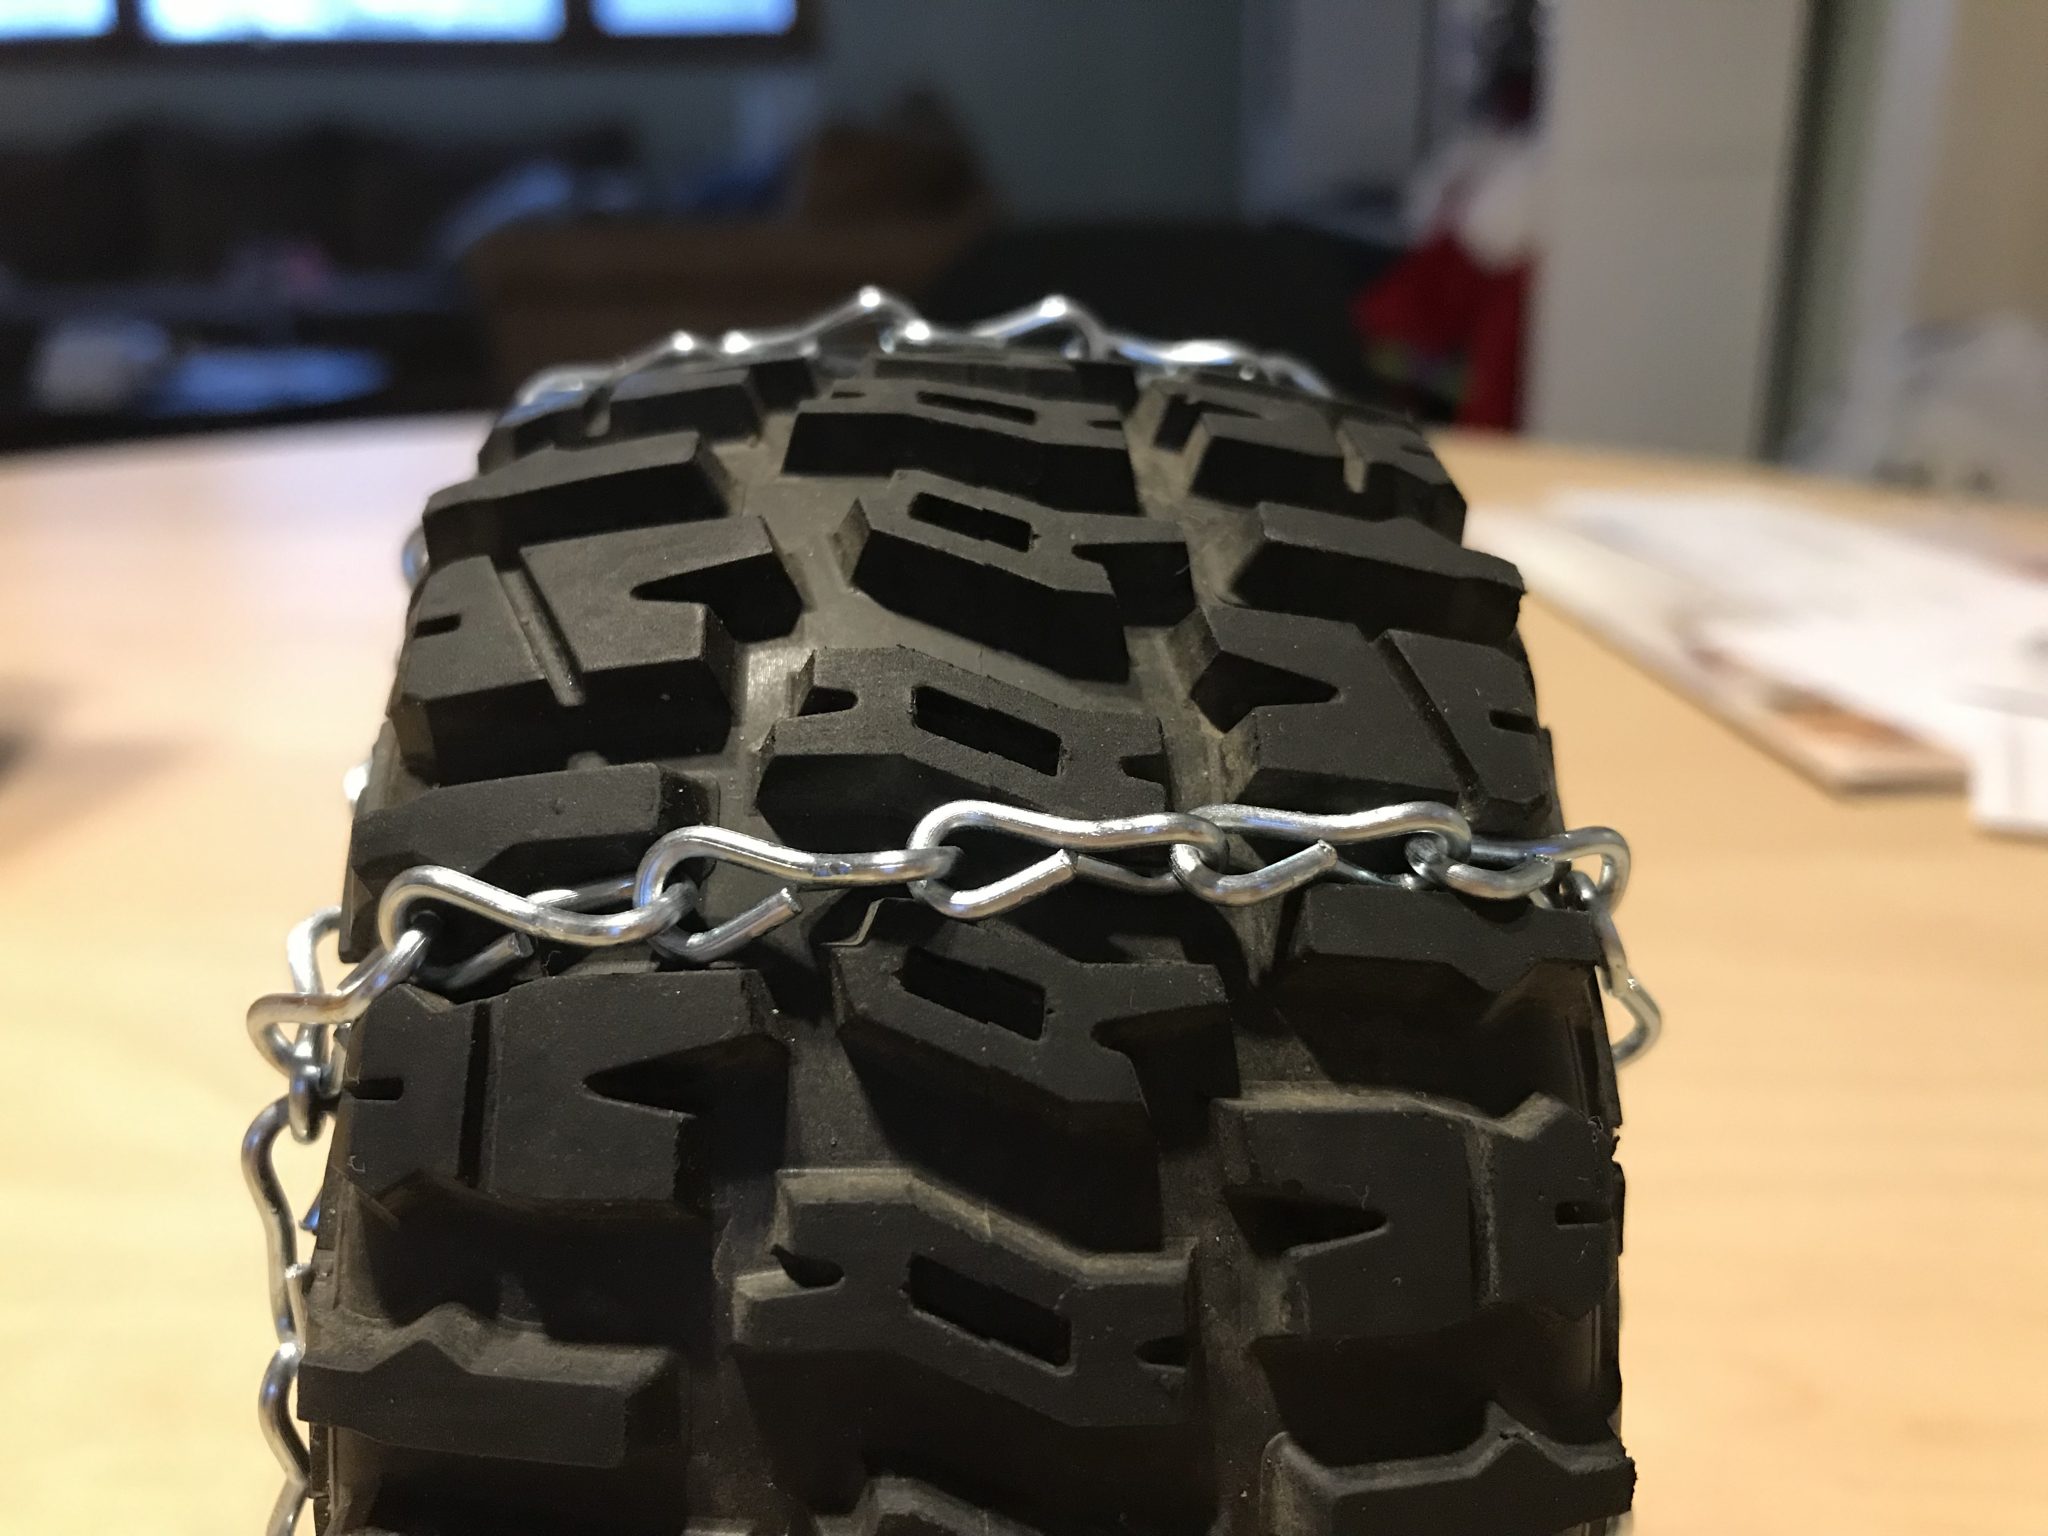
Once clamped, I just needed to construct one cross chain length to go across the tread. Then I could make several other lengths to match. On the Trencher I found there was a nice open slot to weave the cross chain through. Also when you’re choosing your chain size, bring your tire to the hardware store. You can see in the top of this picture that the chain does not need to stick out very far above tread surface to be effective.
To space out the cross chains evenly, I used the Trencher’s tread pattern as a guide. There are 14 of the thin blocks (on each side). You can see the chain going below (on the left) and above them (on the right). I added a cross chain to every other thin block, giving 7 cross chains per tire.
I fit them up on the tire, not paying too much attention to the cross chain connection points on rim chain. Once I had all of the cross chain sections hooked on the rim chain, I removed the chains from the tire by unhooking just the rim chains.
With the cross chains attached and the rim chains unhooked, you can lay it out flat like a ladder and adjust how the cross chains are spaced out:
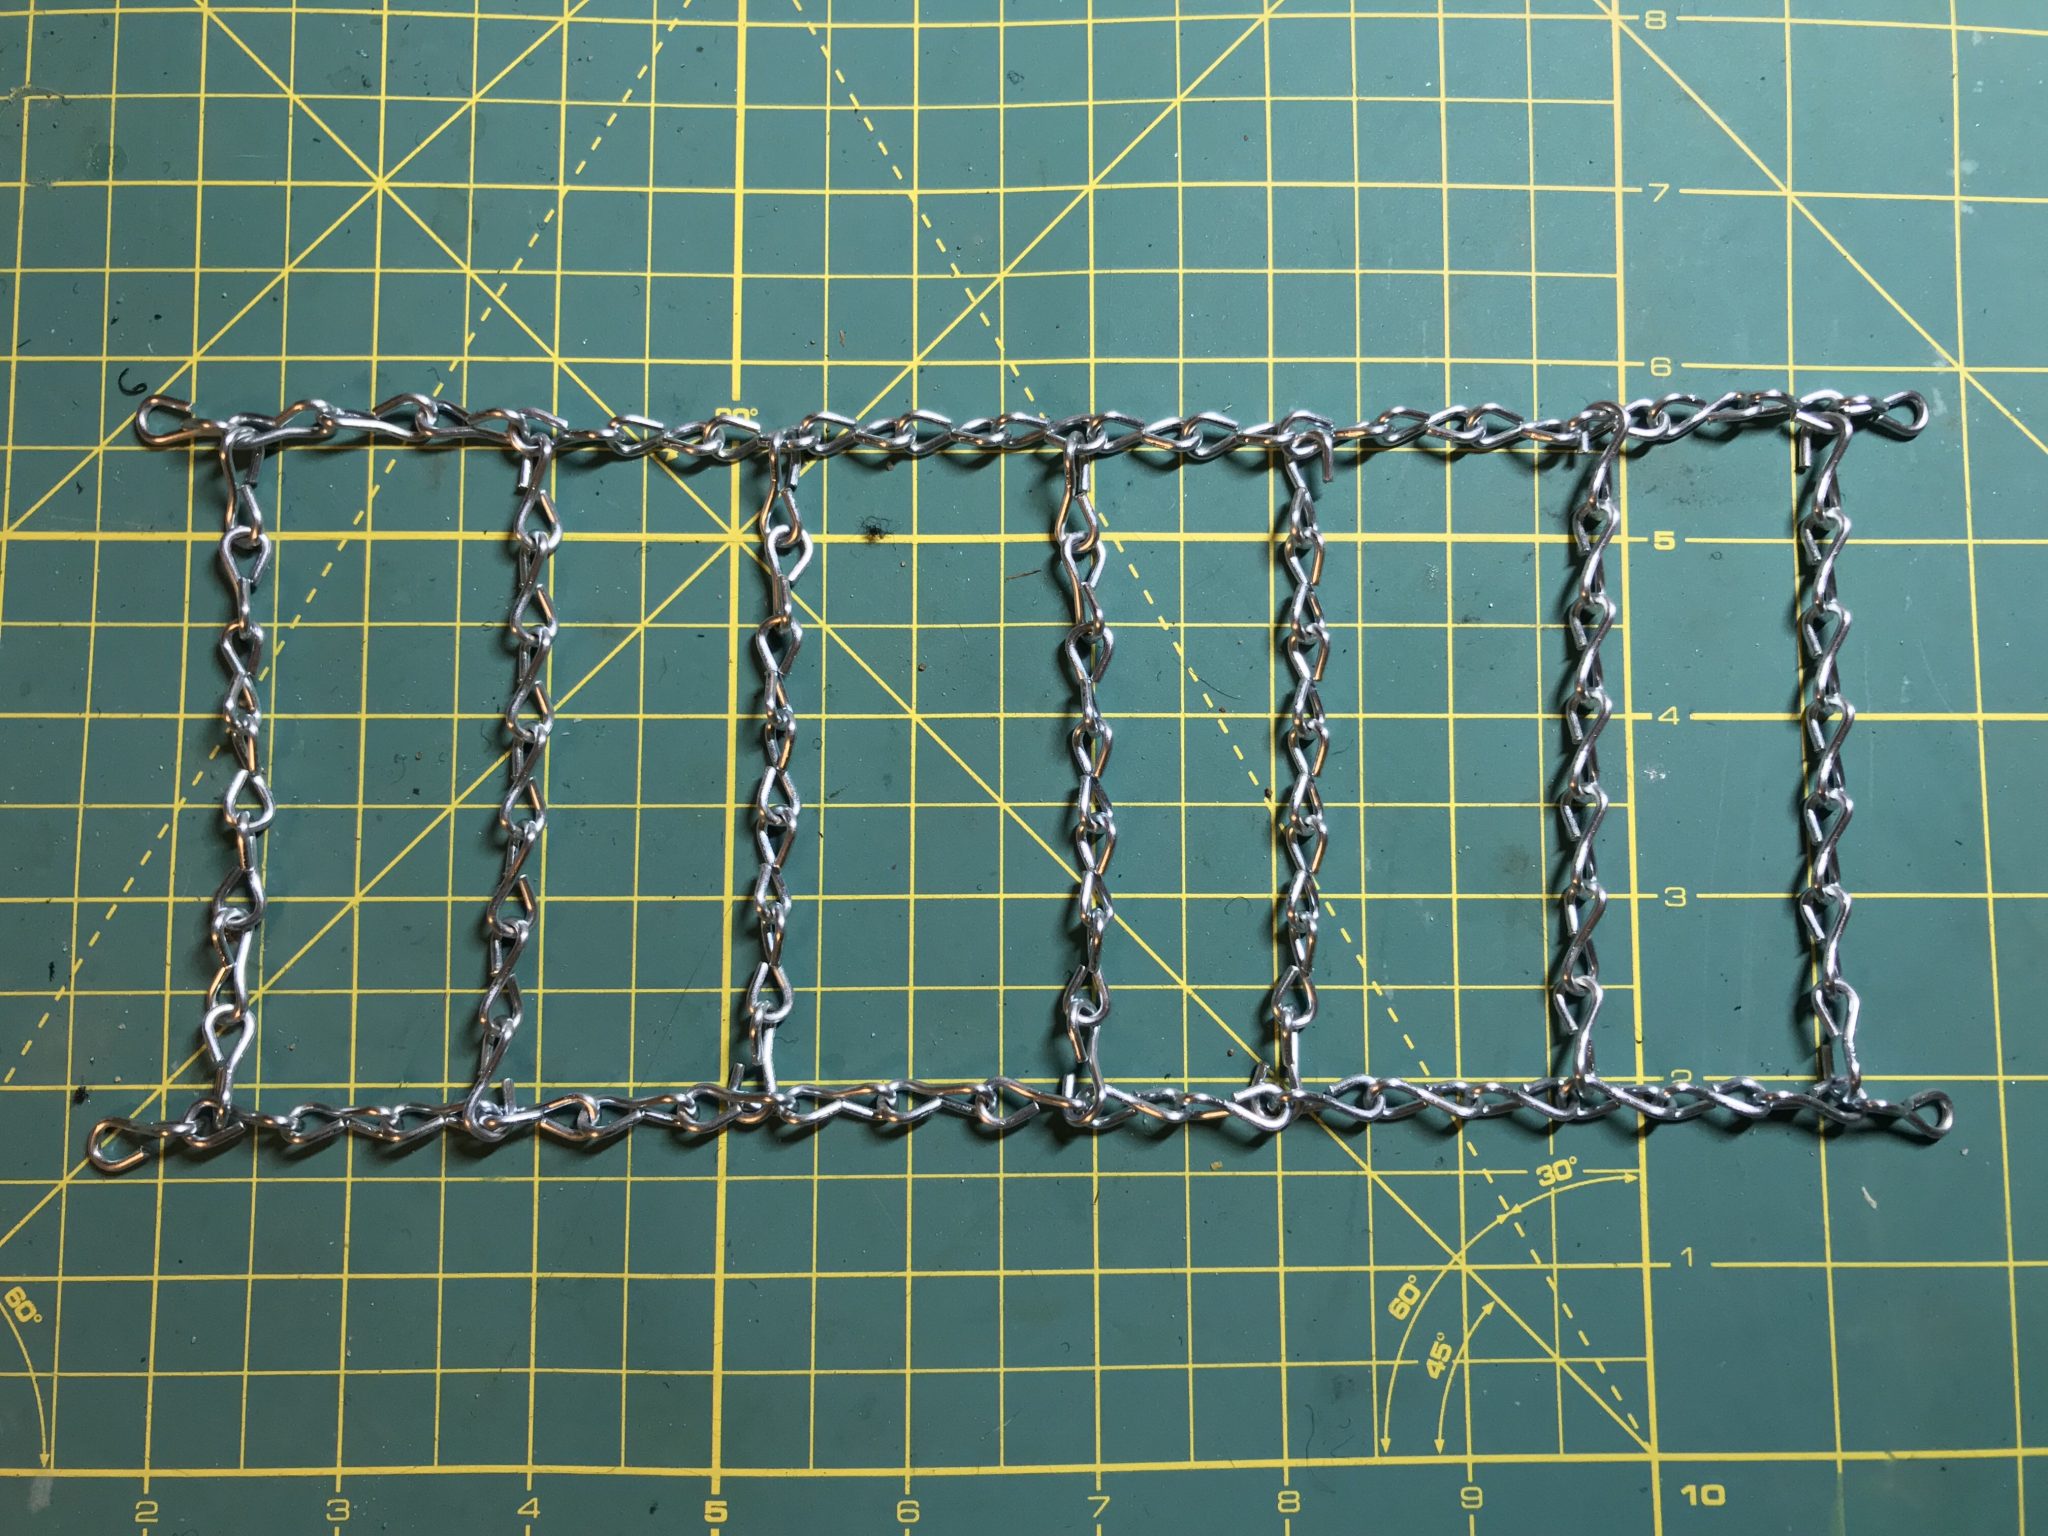
Since each link on this single-jack chain is like a figure-8, I counted each loop as one space. In my example the cross chains were ultimately spaced out with this pattern: 6, 5, 6, 5, 6, 5, (5). The last “5” in parentheses represents the spacing between the last cross chain and the first (where the rim chain hooks together). You can see the spacing in the above photo.
Once you like where they’re at, install the chains back on the tires and crimp the cross chain links closed with a needle nose pliers. Only leave one open link on each rim chain so you can remove them.
Then install on your vehicle, check for clearance, and go test it out!
Results
Here’s how it looks, ready to rumble:
The chains offered paddle-like traction without the extreme propensity for digging like the Sling Shots do. 2.8″ Sand Paws probably provide even better traction, but I have the versatility of being able to remove the chains and use the Trenchers on normal surfaces.
The big 2.8″ tires also give some extra ground clearance that the Sling Shots don’t have. And the extra width makes the tires float over the snow more than dig through it – they will still dig, but at a slower rate.
The chains get a little unruly on hard surfaces – much like a drift car. Plus you’ll be wearing your chains down. Better to stick to the soft stuff when the chains are on.
Clean Up
The Slash chassis can really act like a snow collection tub. With the body raised up to accommodate the big tires, it gets even worse:
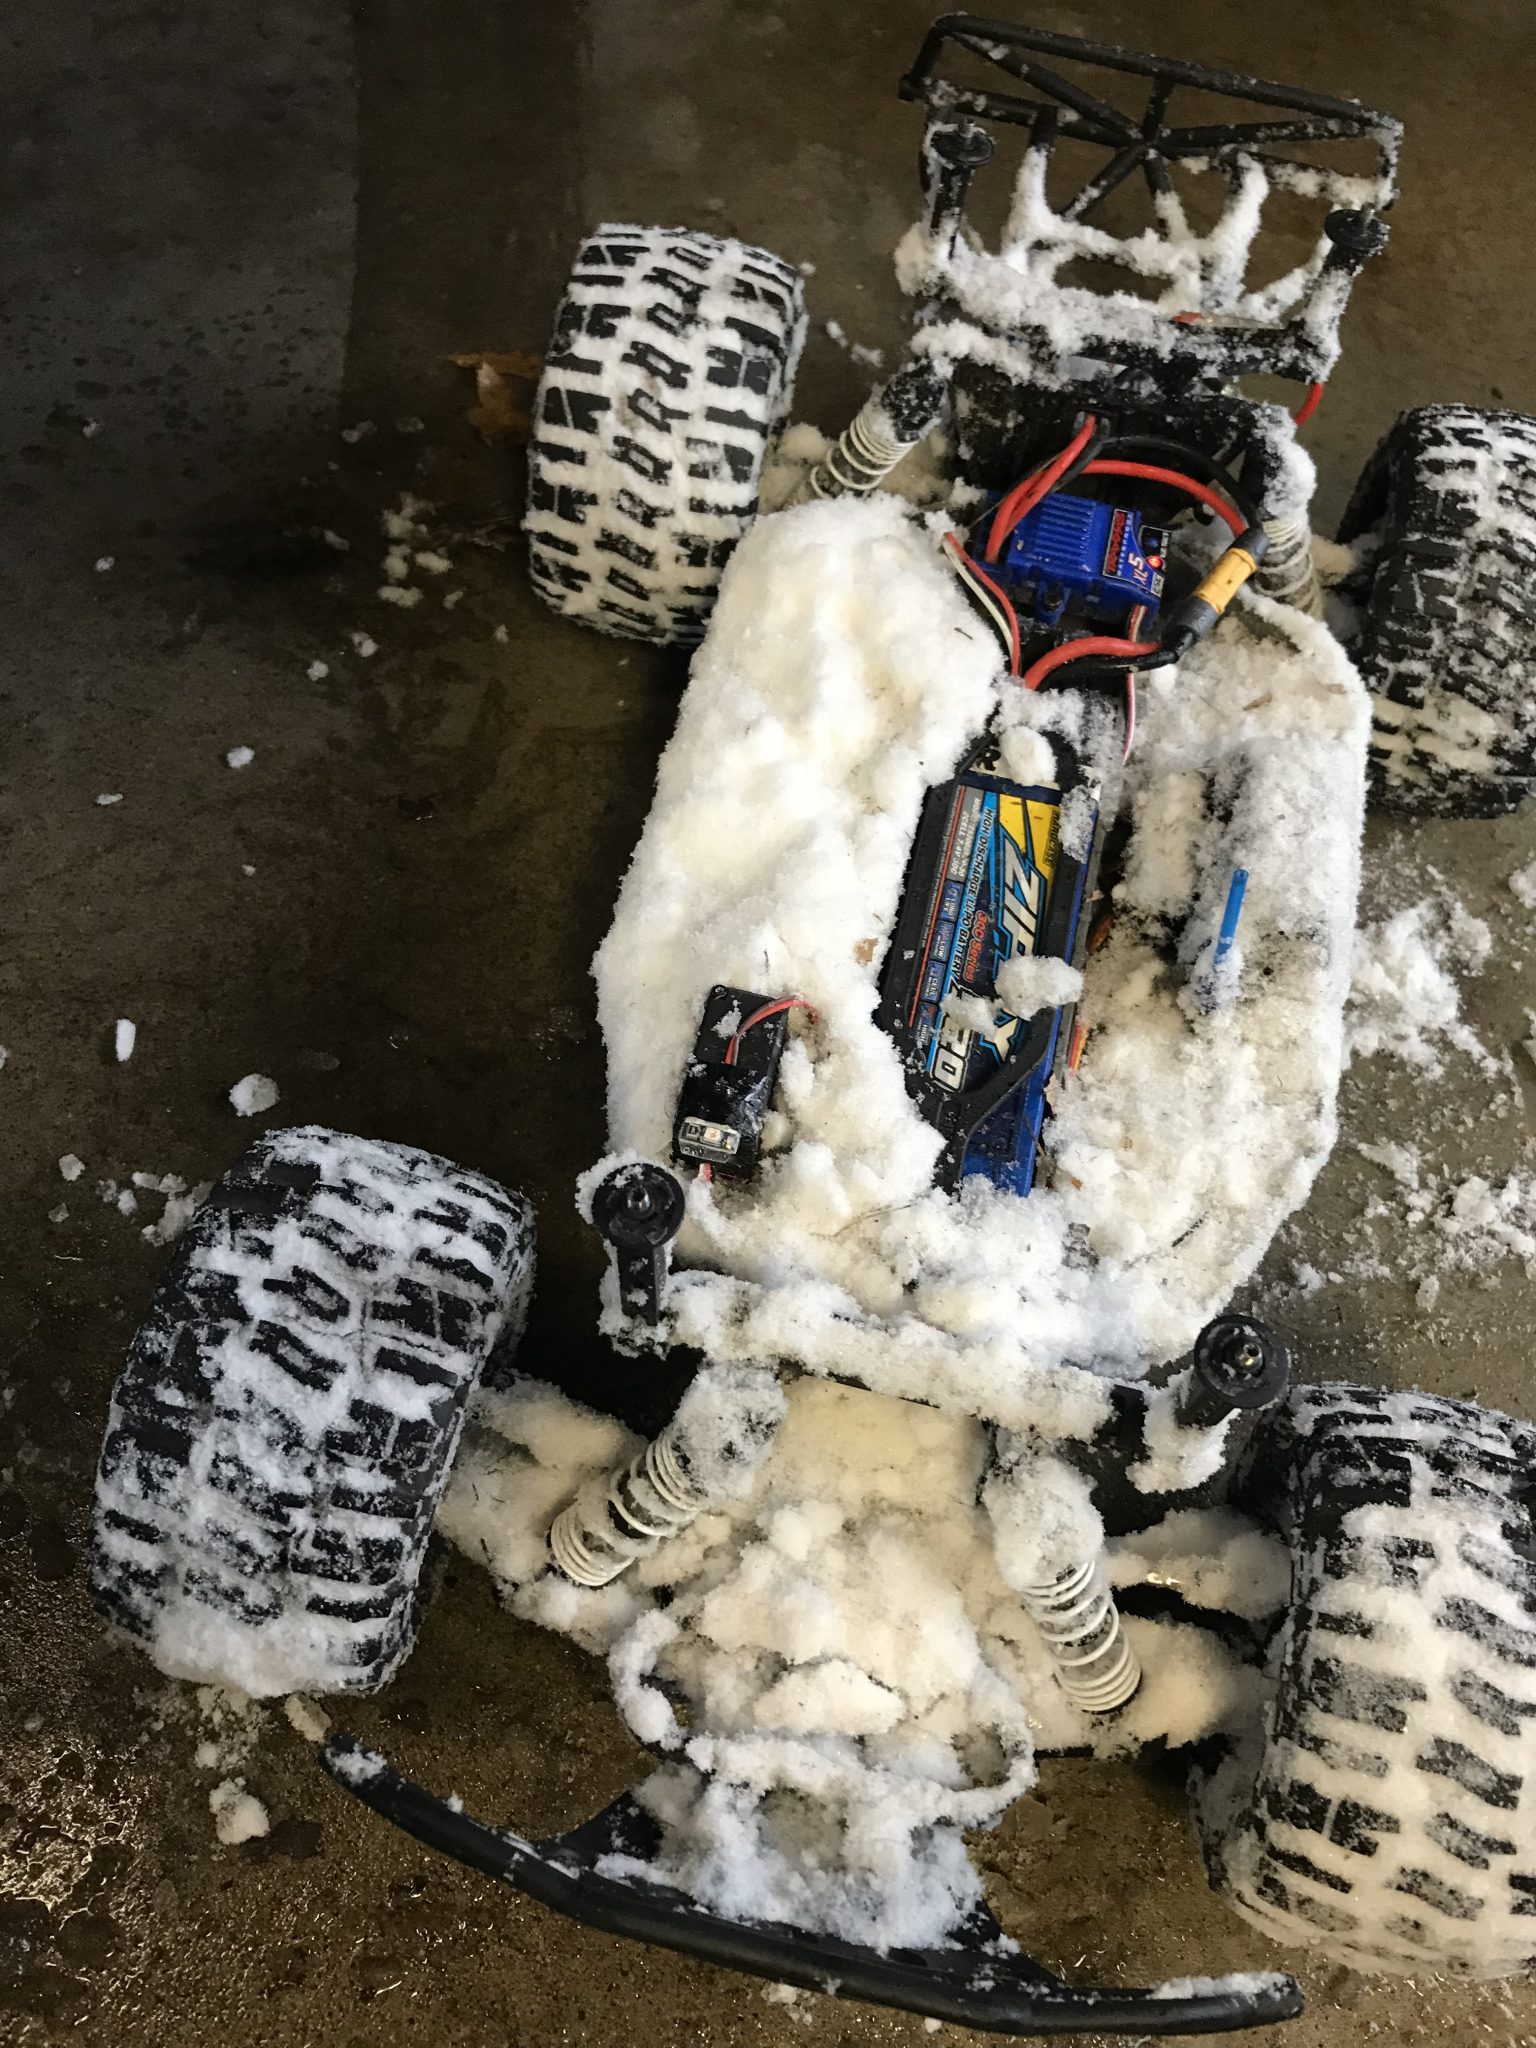
I always blast out any snow with an air compressor in the garage where I can get the snow out before melting and make a mess without worry.
The amount of snow was getting ridiculous so we got some OuterWears chassis covers. Even though the electronics are advertised as waterproof, it gives a little extra insurance. Plus it makes clean-up a heck of a lot easier:
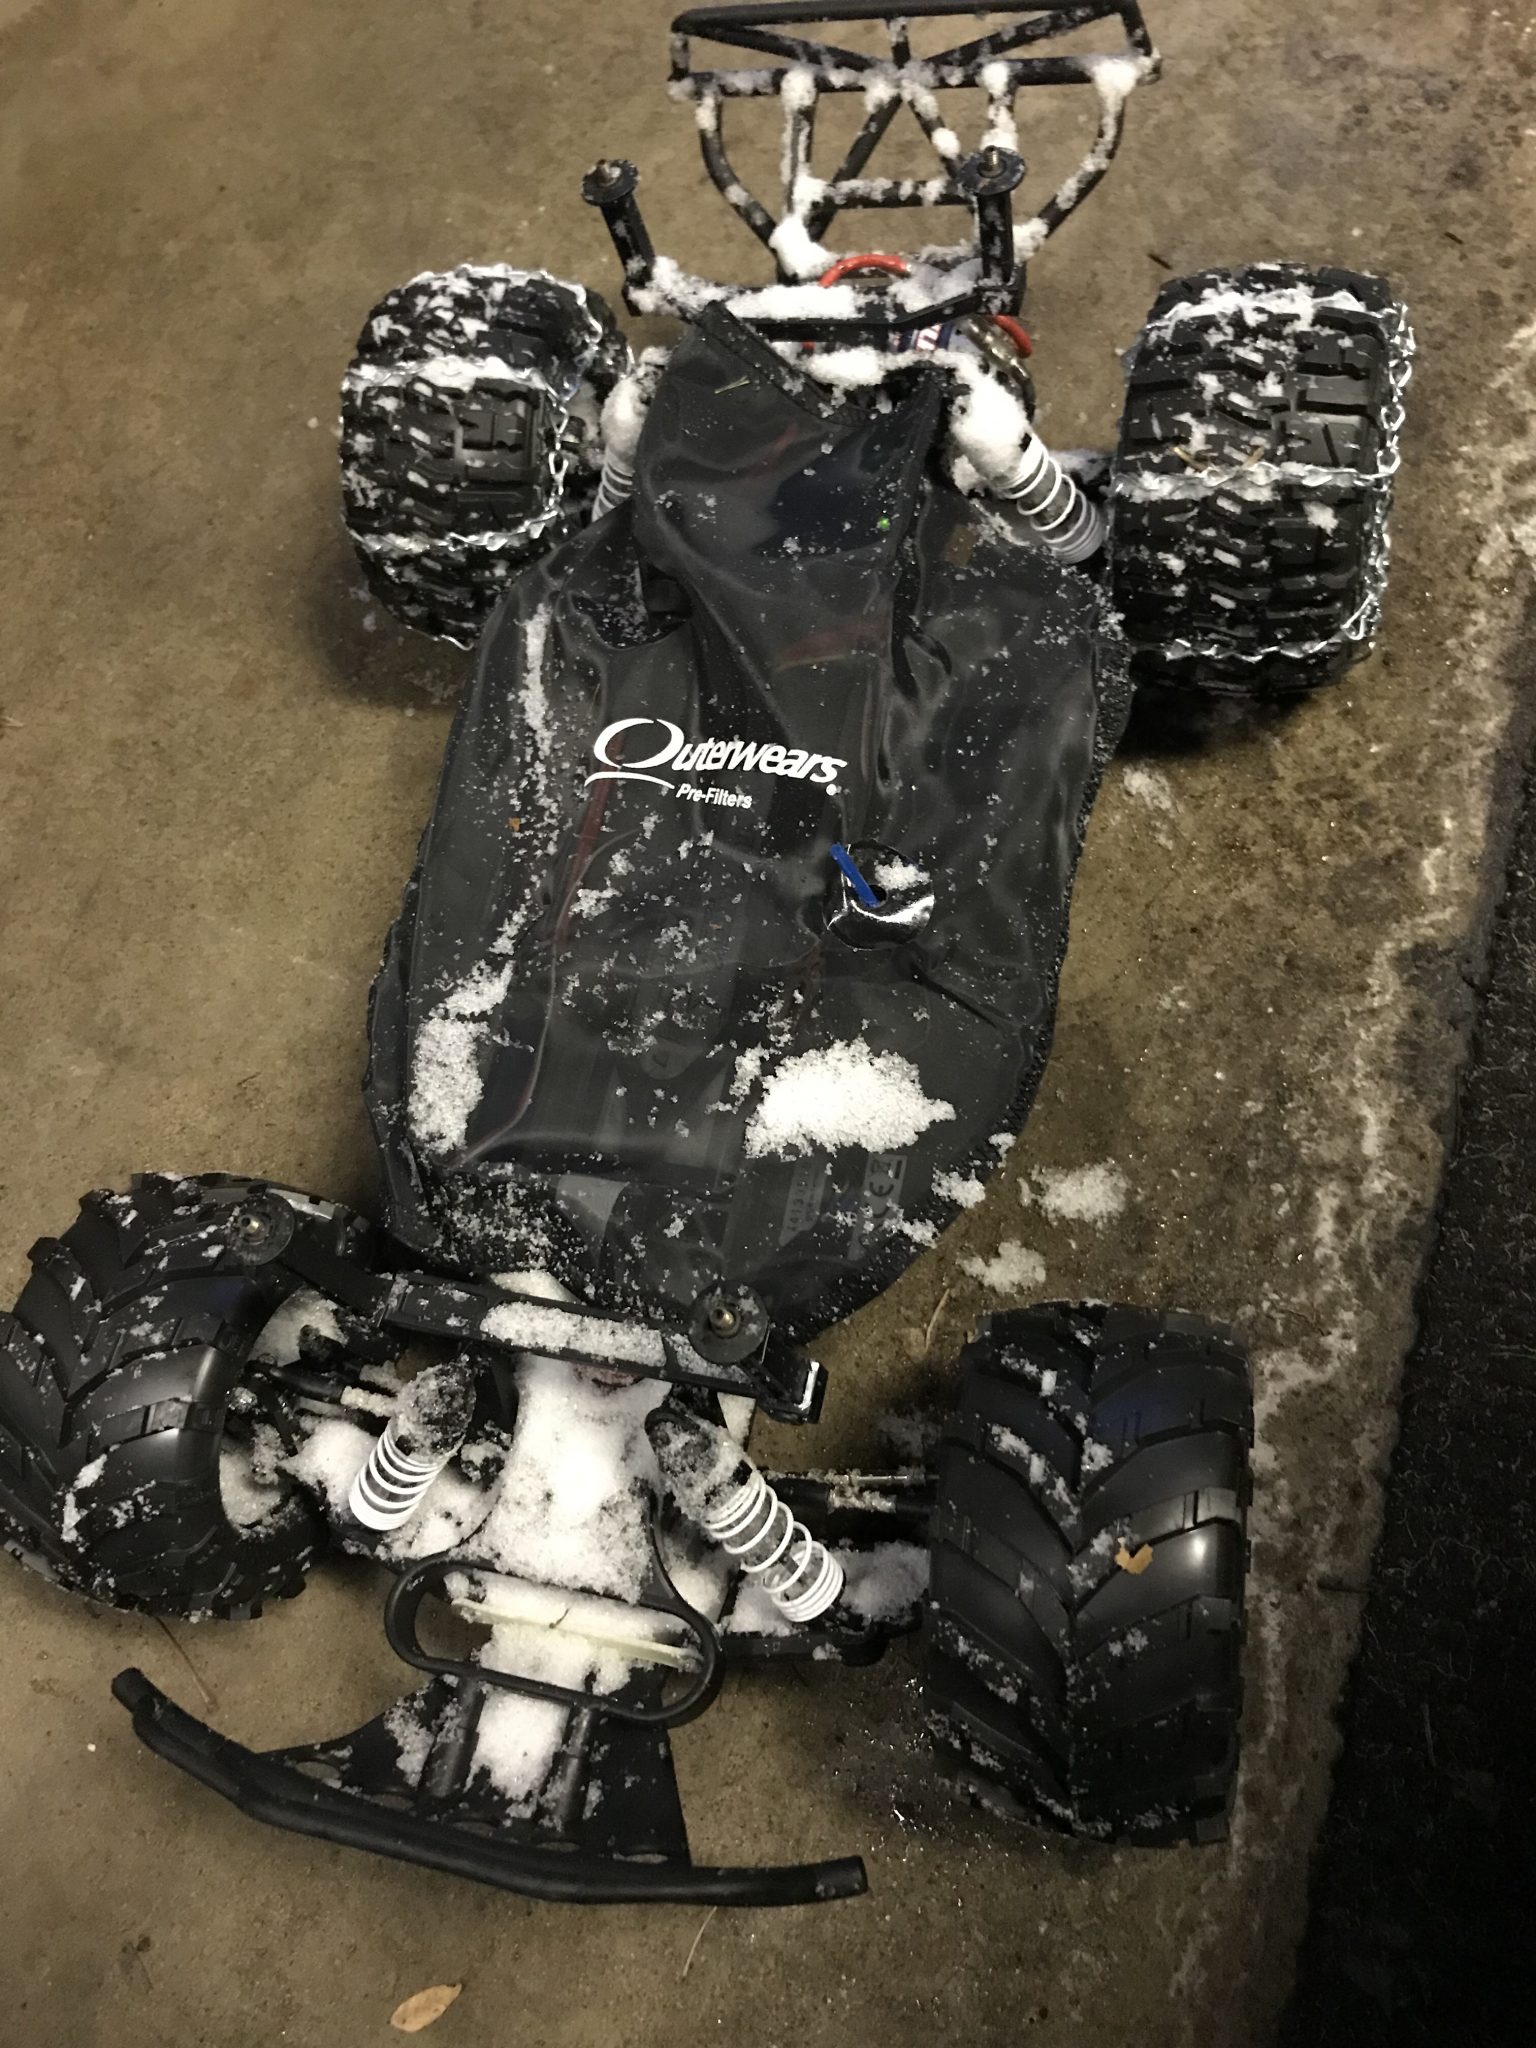
Now we can get out in the elements and have a lot more fun with a lot less frustration!
[…] the winter it can be hard to get out and play all of the time. We built some chained tires to tackle the snow. Unfortunately 2019 has been more ice than snow, and the polar vortex kept us inside for over a […]